(updated in 2024)
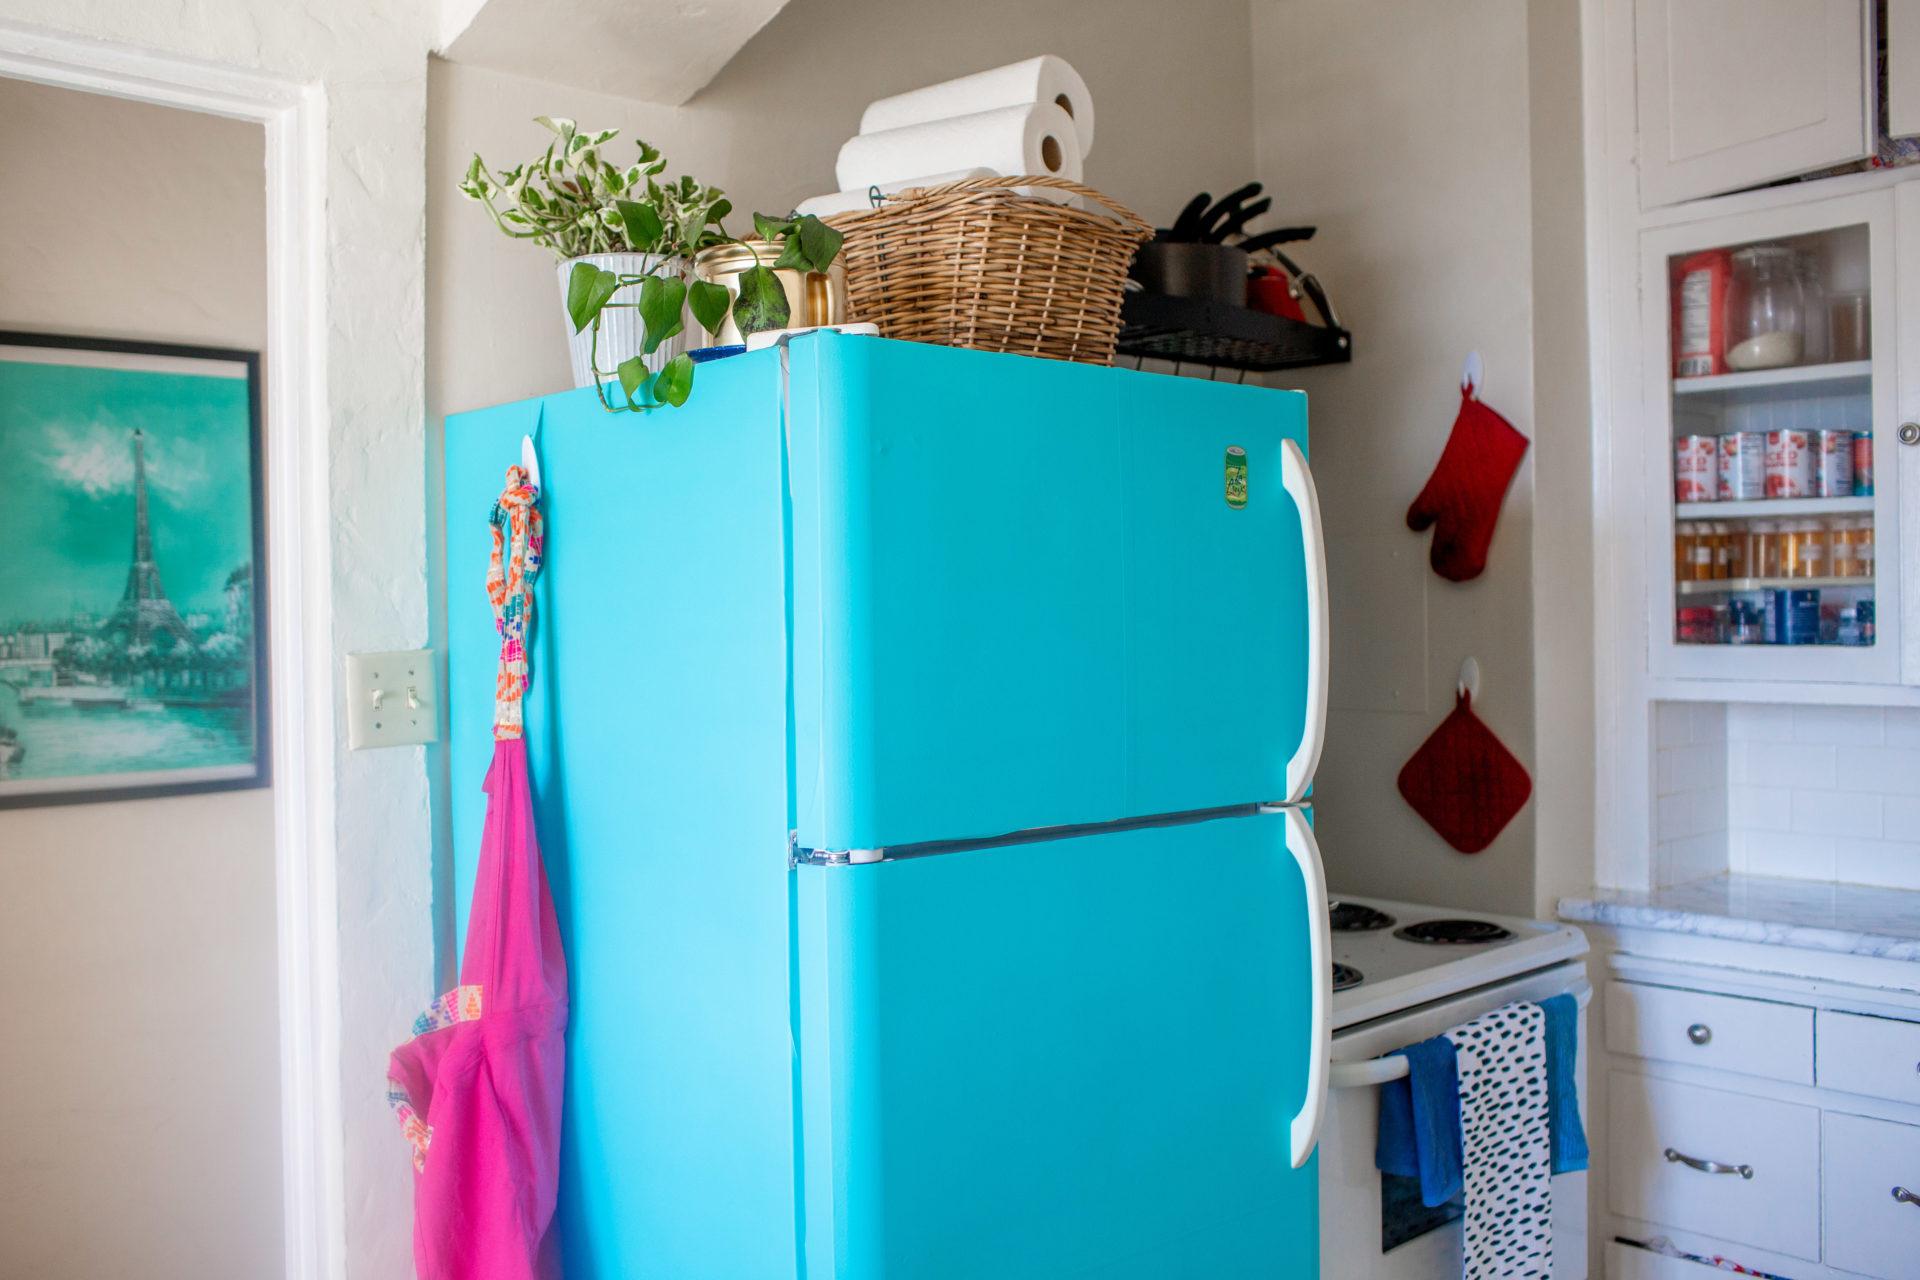
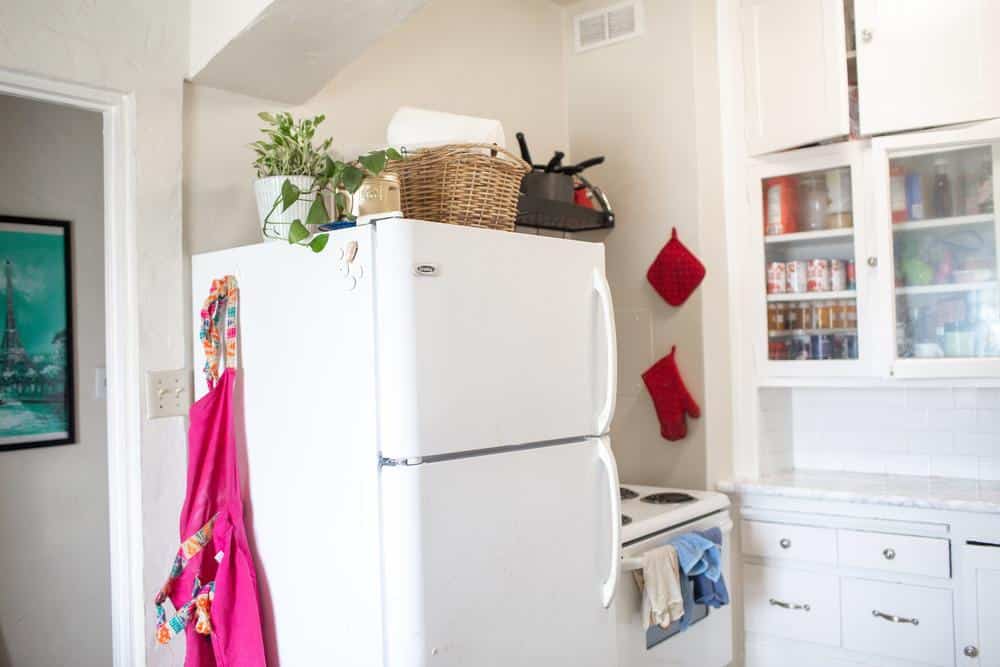
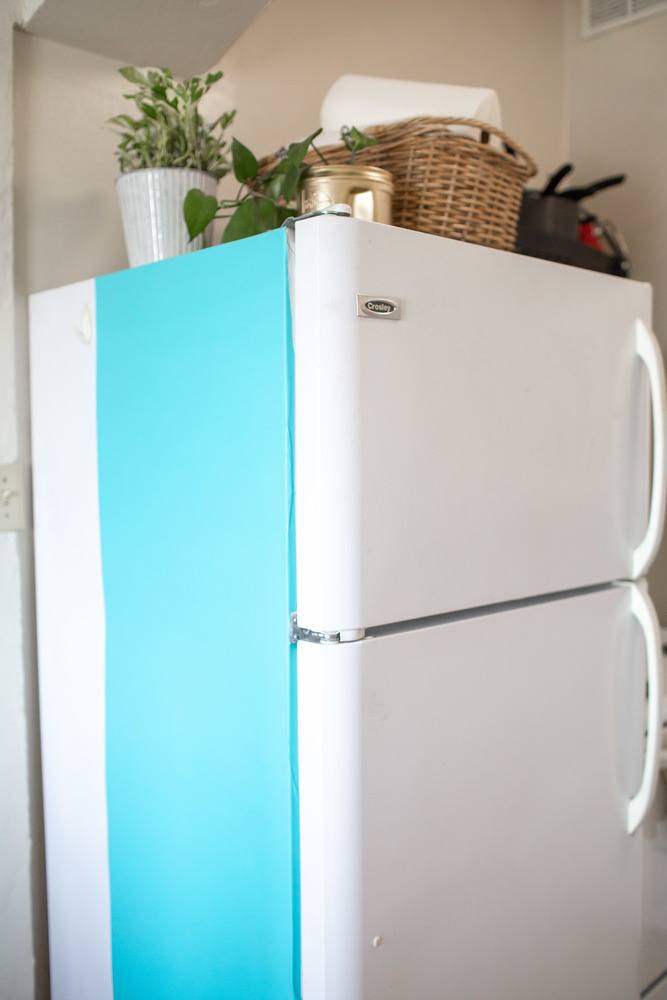
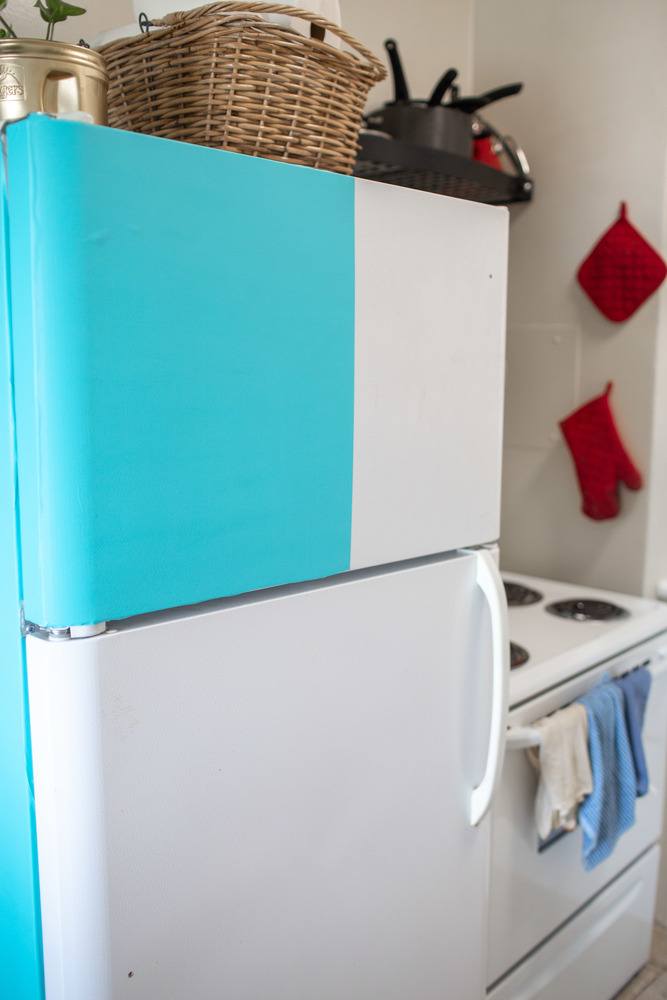
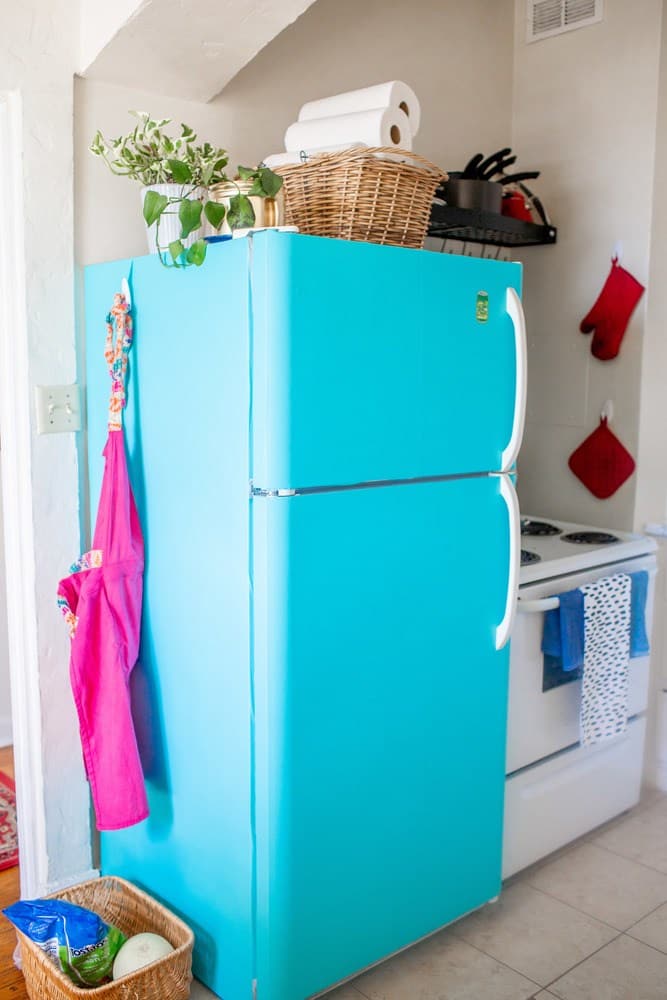
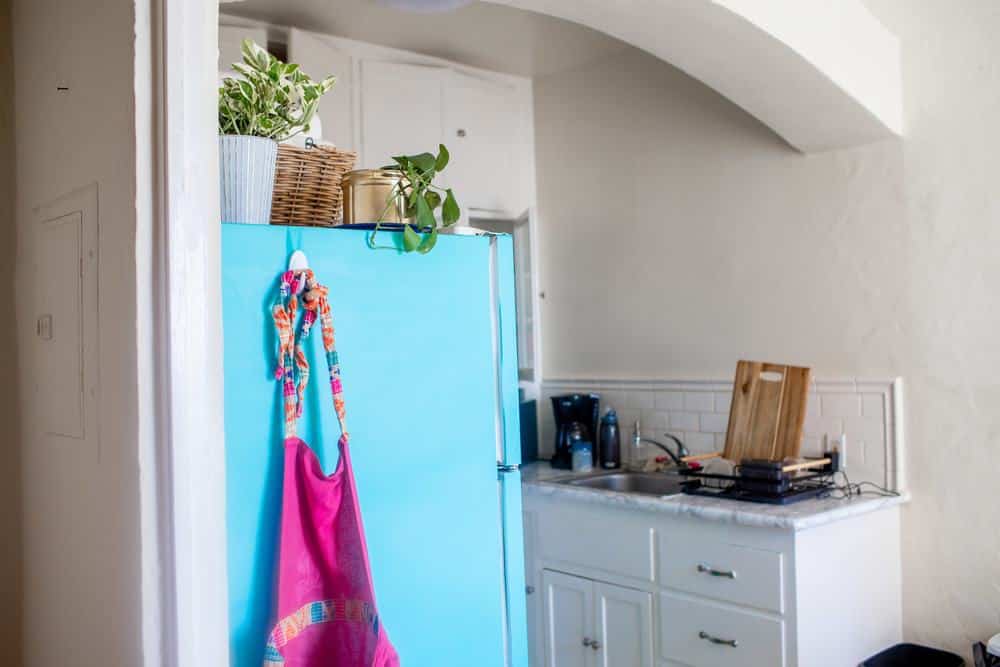
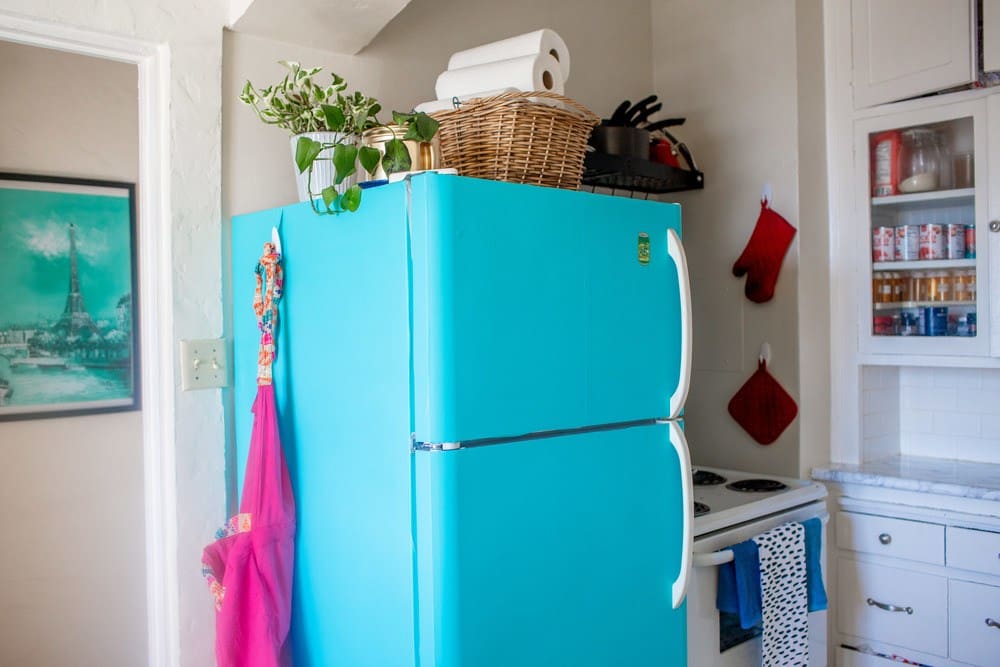
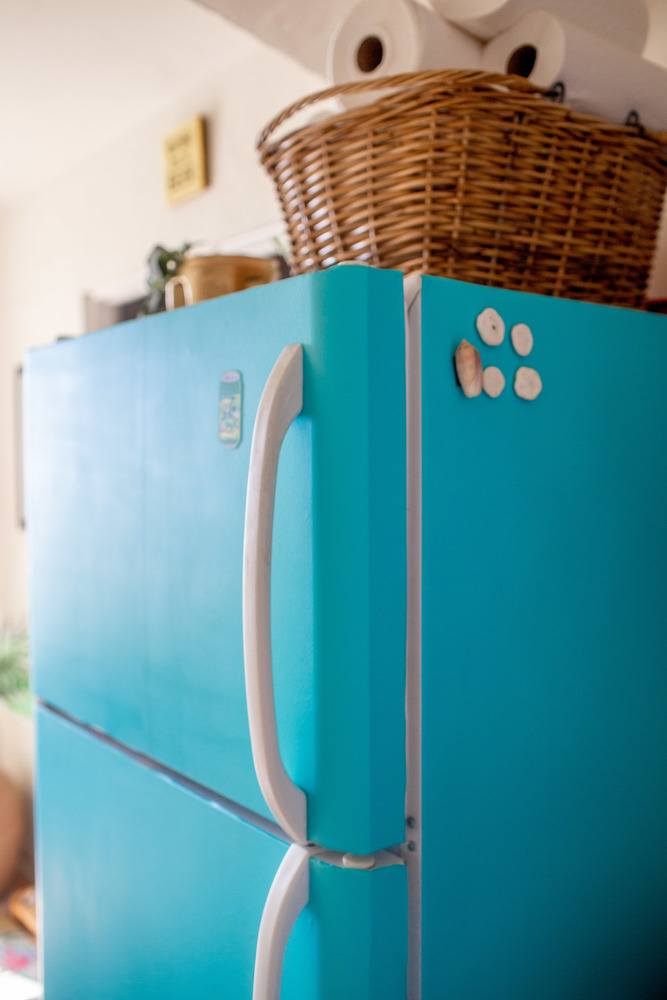
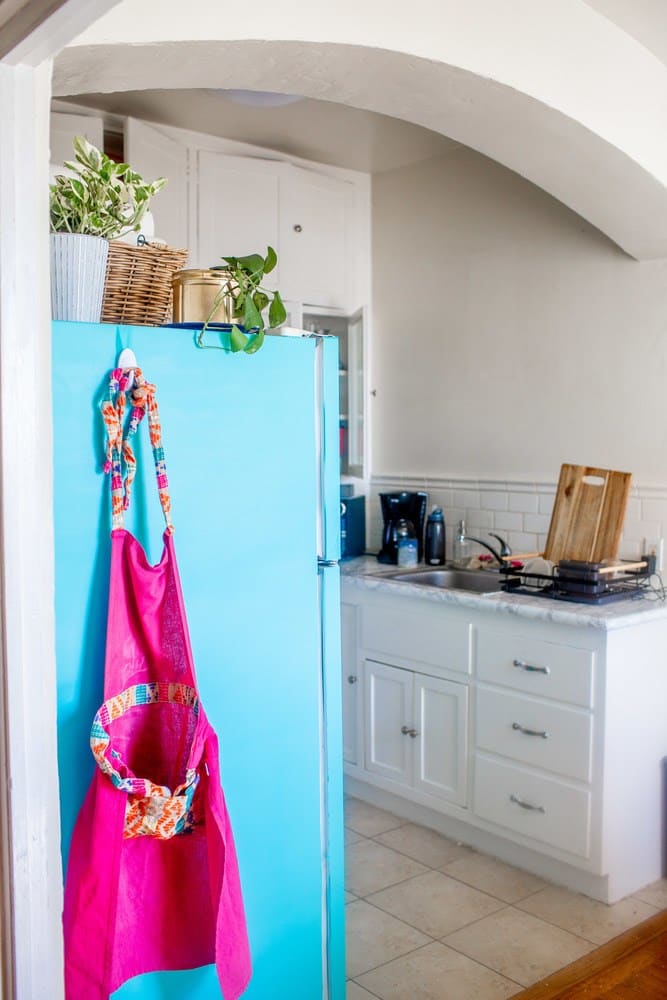
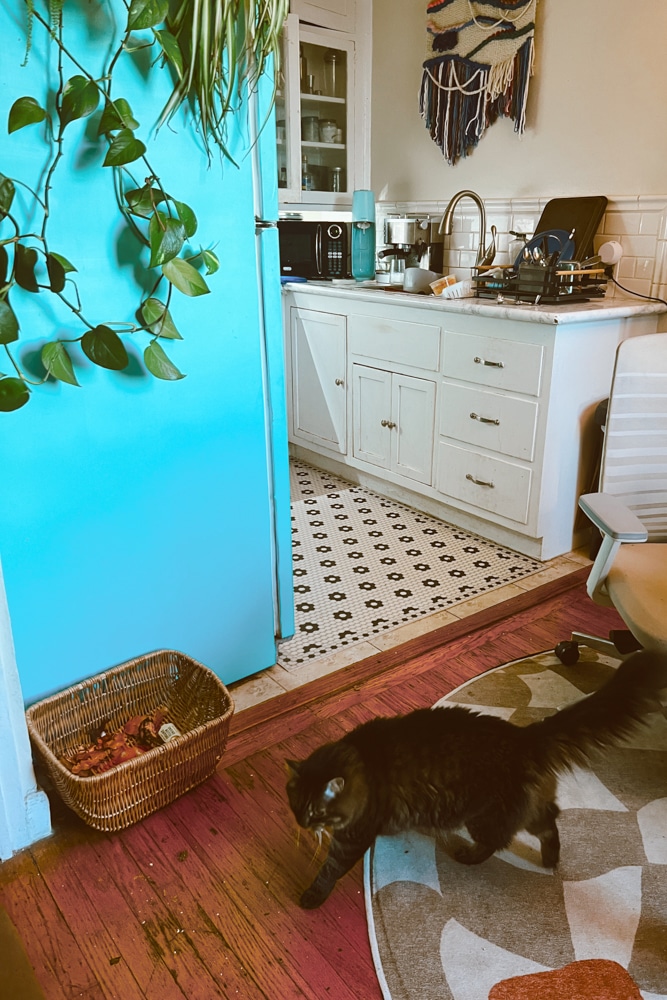
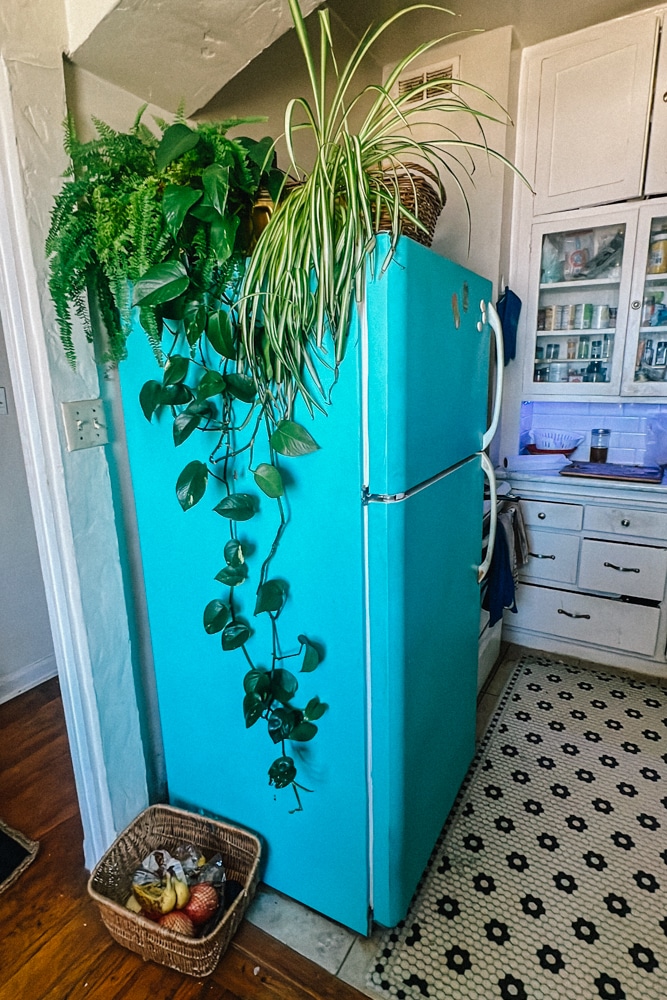
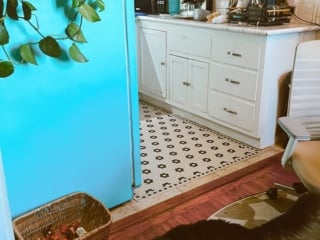
$20 and about 2 hours later, I turned my boring, dirty old refrigerator into a beautiful blue retro-feeling statement piece.
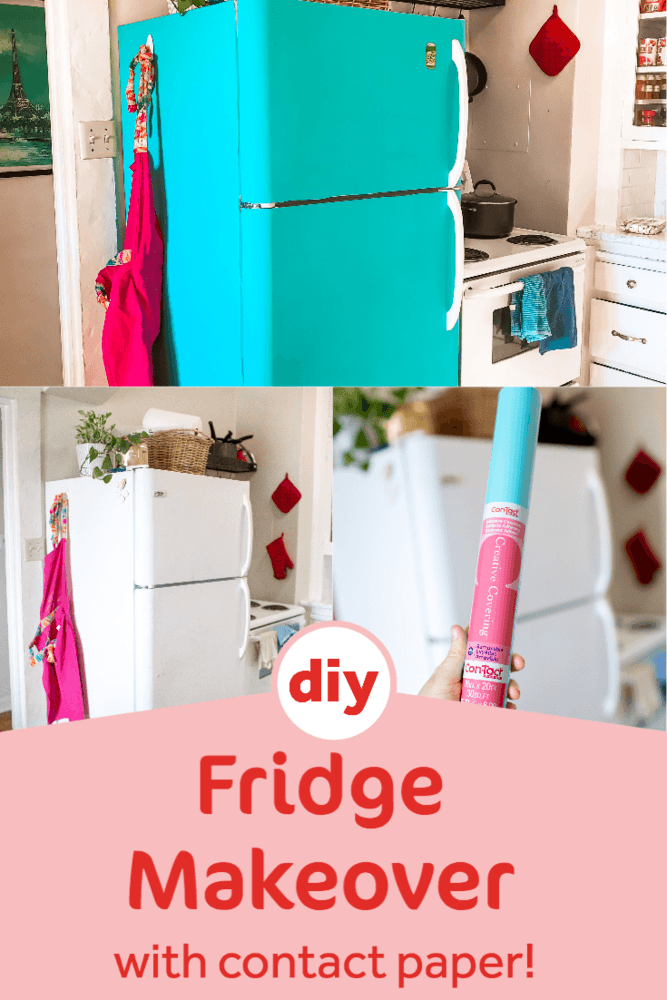
My husband and I live in San Francisco. We’ve been here for 5 years and it only took quarantine to finally give me that boost of motivation to do a rental-friendly kitchen makeover. In this post I’m sharing my tips for covering your fridge in contact paper and tons of before & after photos!
DIY: How I Put Contact Paper On My Fridge (Before & After Photos!)

>> Got a question about my fridge makeover that you need answered quickly? DM me on Instagram @thewhimsysoul and I’ll be happy to help!
I’ve waited way too long to design a kitchen I actually love. We rent and I know this tiny studio apartment is not my forever home. I’ve sort of been waiting to really dive deep into designing the perfect kitchen until we had a place we’d be living at longer.
But its been 5 years, and we aren’t leaving any time soon, so I pulled the trigger on a makeover!
Also, quarantine boredom got me in a nesting / DIY mood! I started with turning the gross brown granite kitchen countertops to chic marble beauties with the help of decorative contact paper!
I was researching removable wallpaper for our fridge since I was initially thinking of using a floral pattern but hot dang, removable wallpaper can be expensive! I’m talking upwards of $50 a sheet at places like Chasing Paper (which is super cute but I think that would come out ot a $400 DIY fridge makeover, so no thanks!)
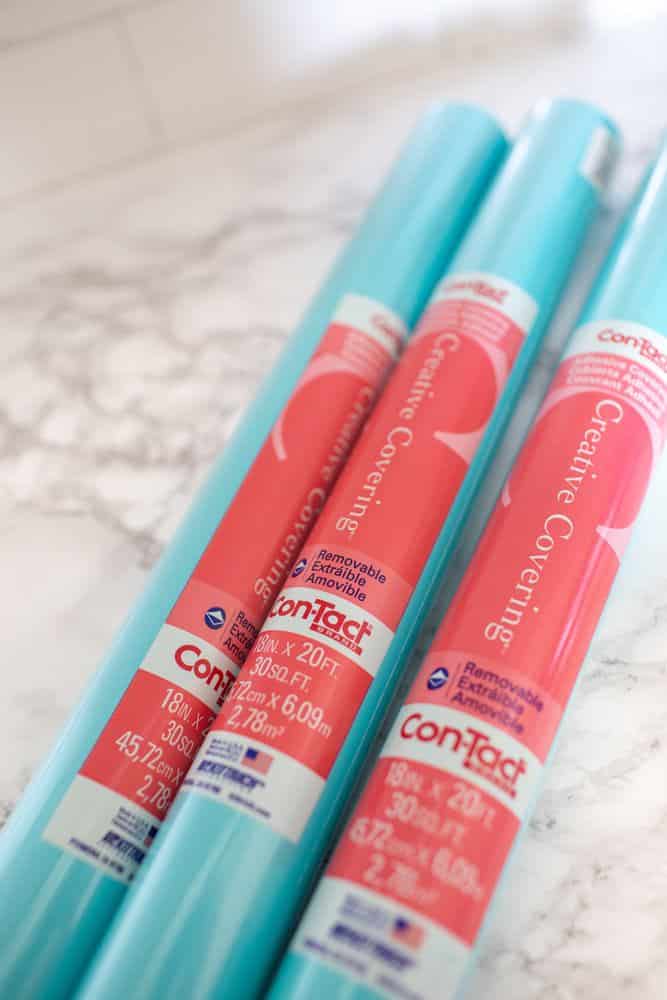
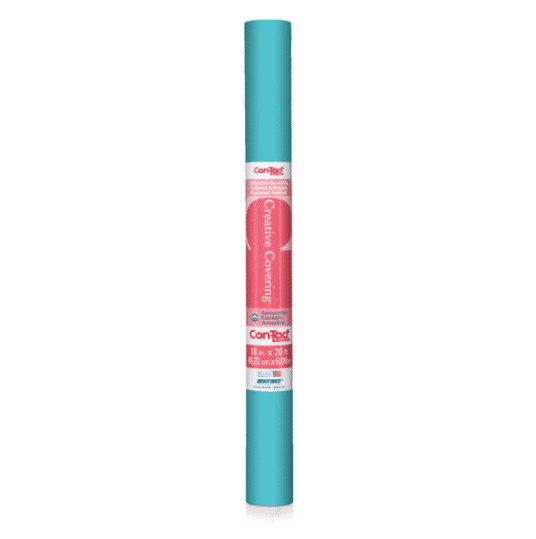
Instead, I bought contact paper from Con-Tact, which is that classic OG contact paper brand that you may remember from childhood. You can easily buy this online at places like Target, Amazon and Home Depot. Or, just go into a Home Depot and pick colors out in person. Rolls should be about $9-$15 a roll depending on the pattern.
I went with a teal/blue shade for a bold pop of color in our fridge. It took everything in my body not to do a pink and green decor theme like I have in our living room AND bathroom (I guess I love those colors together!) Since my husband, Robin, works in the kitchen as his office, I decided to do a blue color scheme since blue is his favorite color.
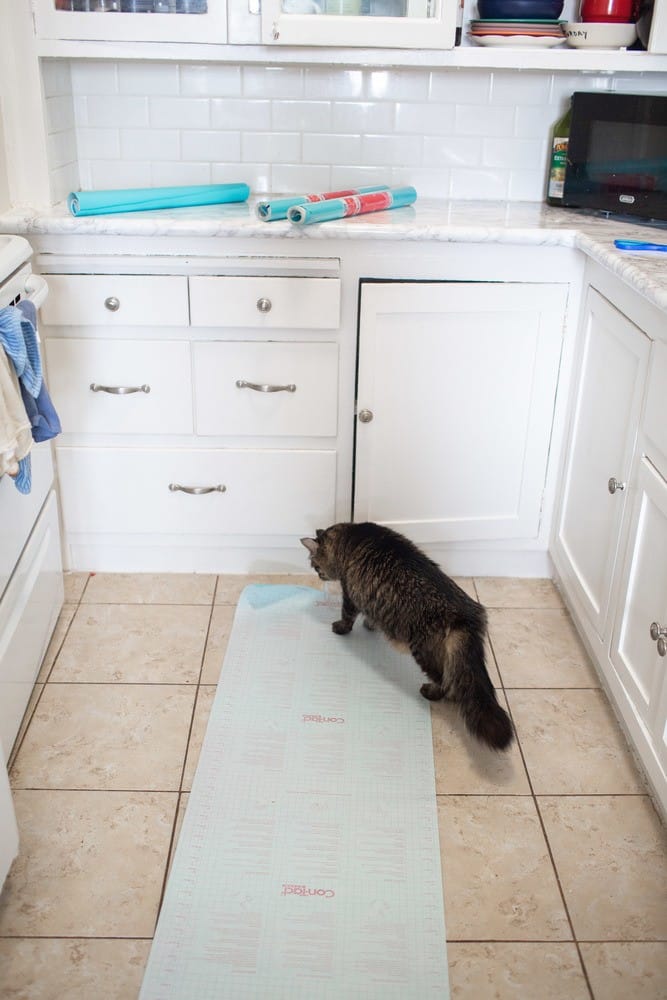
I bought 3 rolls and only ended up using 1.5 rolls for this project. It’s ALWAYS a smart idea to buy more rolls than you think you need because it’s a good chance you’ll mess up at some point or underestimate the amount you need. You can then return the unopened rolls or hold onto them in case you have to do touch-ups in the future.
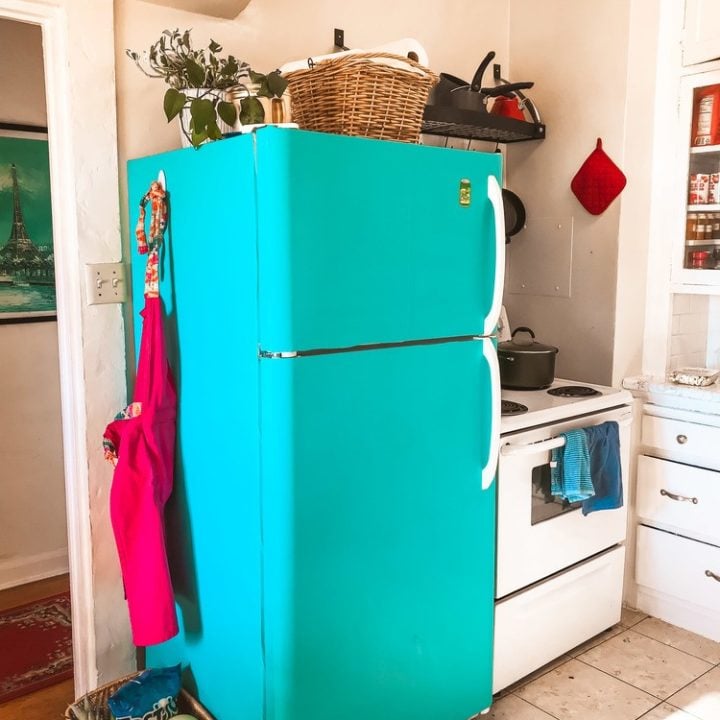
DIY: How I Put Contact Paper On My Fridge (Before & After Photos!)
Materials
- 2-4 rolls of contact paper (depending on size and pattern!)
Tools
- Scissors
- Measuring Tap
- Windex (optional)
Instructions
- Buy a product that has a low adhesive or is marked as " peel and stick ". DO NOT get something heavy-duty that it's permanent because otherwise, it'll be really hard to take off when you move out.
Own your home/fridge? You can consider painting it or using heavy-duty paper, but remember that in most American homes, you leave the appliances when you sell that house so that could be an unforeseen cost in the future. It's better to use a removable contact paper! - Clean that fridge!! You don't want to seal in dirty and grim for years and years (gross!) plus you need a clean and dry surface to apply the paper to.
- Remove the fridge handles + decals. Our decals were really easy to pull off and we put them in a bag and stuck them to the back of the fridge so we could find them when we move out and have to stick them back on.
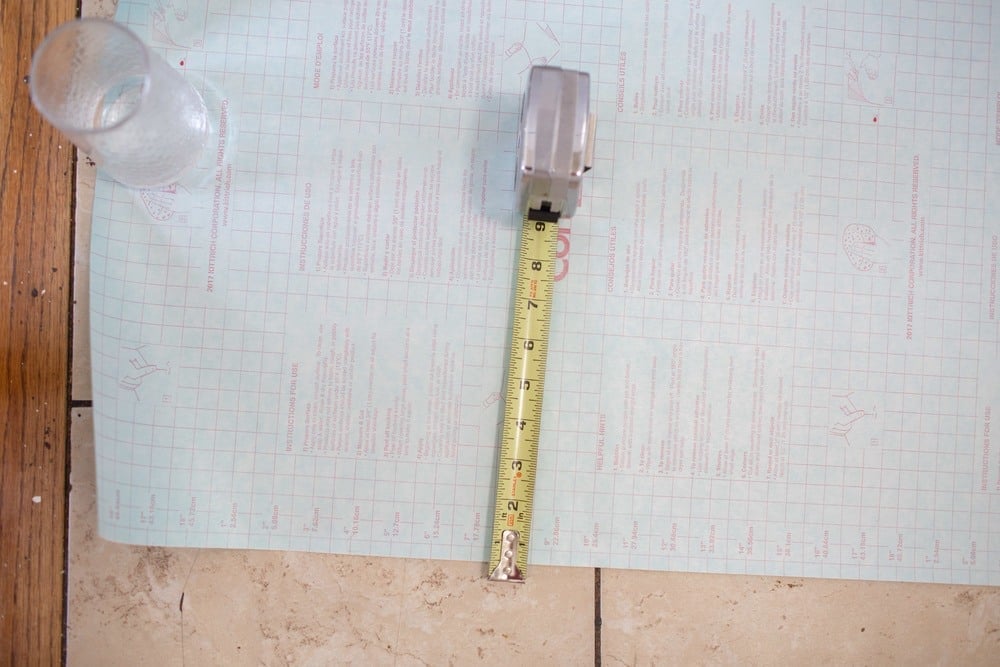
The handles are really easy to remove from the door! Just use a screwdriver to take out the screws and you should be able to pull your handles off. - Measure out your pieces. You know the saying: measure twice, cut once! I recommend adding about an inch on either side just in case you measured wrong or have issues placing the contact paper on the fridge. It's SUPER easy to trim the excess off.
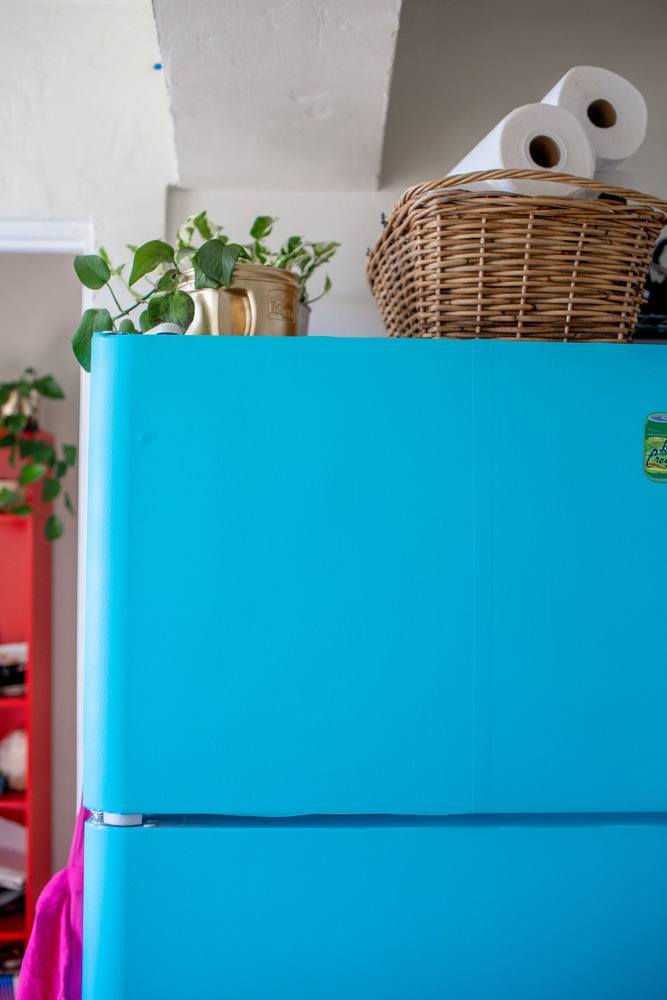
- Now, time to install. I found it much easier to do with the help of another person so they can hold one edge to prevent the paper from folding onto itself as you place it just right. After you place each piece, carefully smooth it out and peel and smooth and peel, making sure to readjust to remove any air bubbles.
- After your done, just screw the fridge handles back on and BOOM, you got yourself a beautiful new fridge!
Notes
PRO TIP: use Windex on your fridge if you are having a hard time placing the contact paper! This is a trick I used on my countertops. A light layer of Windex helps your contact paper slide a bit so it's easier to line up correctly. Then you simply smooth it to work out the index.
I actually didn't need to use that hack on the fridge, I'm not sure if it's my fridge type or the paper I bought but I found it so easy to readjust. But a stainless steel fridge may be a harder surface to work on!
Also, don't forget to buy more rolls than you think you need in case you mess up!
Removing Contact Paper From Fridge
I haven’t removed the contact paper on my fridge yet (I just put it up!) but I did test a strip when I was applying found it super easy to just pull off. I don’t foresee it being an issue at all when it comes time for us to move out and take it off. Contact Paper isn’t like a sticker that’s hard to take off.
I did read online that using a blow dryer to heat up contact paper can help loosen the adhesive so if you try this and have trouble removing it, try that!
Update After 4 Years
I’m so happy to report that after 4 years my blue fridge is going strong!! I was just looking at it this morning and thinking “dang, how was 2020 4 years ago?!”
I didn’t know how this project would hold up when I did it over lockdown but I’m thrilled that it worked out so well. I honestly don’t know why anyone would pay a butt load of money on a fridge just because it’s a specific color when you can just do contact paper.
That being said, I am a fan of Smeg fridges and do have a list of affordable retro fridges I love, if you are so inclined.
But, the paper holds up well. It cleans well when we get smudges or food stains on it. No tears or warping can be spotted. And it makes our kitchen 10000% more fun.
So, that’s my DIY refrigerator makeover! I can’t wait for the rest of my blue decor pieces to come in to really finish the transformation on this space. Still low-key annoyed at myself for not tackling this space earlier.
I think all in all, my kitchen makeover is going to cost about $500 which is SUCH a low price for literally changing the whole vibe of a room. If you are also in a place where you aren’t happy with parts of your home or rental unit, I say just GO for it. Try making it better because you deserve to live in a space that makes you happy!
If you have any tips to add, leave a comment below so everyone can see! Got questions? Leave a comment or DM me on Instagram @thewhimsysoul and I’ll be happy to help!


37 comments
Introducing PetProTrim!
Is your furry friend in need of a little grooming TLC? Look no further! PetProTrim is here to make sure your beloved pet looks and feels their best. Whether your companion has a luxurious coat that needs a trim or those nails are getting a bit too long for comfort, we’ve got you covered!
Why choose PetProTrim?
Professional Grooming: Our team consists of passionate pet lovers who are experts in pet grooming techniques. Your pet will receive top-notch care in a stress-free environment.
Tailored Services: From basic trims to breed-specific styles, we customize our services to meet your pet’s unique needs and your preferences.
Safety First: We prioritize your pet’s safety and comfort above all else. Our grooming practices adhere to the highest standards, ensuring a positive experience for your furry friend.
Convenience: With flexible scheduling options and a convenient location, grooming your pet has never been easier.
Happy Pets, Happy Owners: Experience the joy of seeing your pet strut their stuff with confidence after a session at PetProTrim. Your satisfaction is our ultimate goal!
Don’t wait any longer to pamper your pet! Schedule an appointment with PetProTrim today and treat your furry companion to the grooming experience they deserve. Because when it comes to your pet, only the best will do. #PetProTrim #HappyPetsHappyOwners
Blueland’s approach to sustainable cleaning products is really refreshing. It’s crucial to have effective solutions that are also kind to the environment. After sprucing up your home with eco-friendly products, why not relax with a different kind of cleaning game at papaspizzeria.net, where you can manage your own virtual pizzeria!
Using Blueland’s eco-friendly products can feel like a small daily adventure in making better choices for our planet. If you’re up for a real adventure after your cleaning routine, head over to freddygames.org for some thrilling horror games to keep the adrenaline going.
Establishing a cleaning routine with Blueland’s delightful scents and sustainable products can be as rhythmic as following a beat. If you love the rhythm in your routine, you might enjoy fridaynightfunkins.net, where music and timing create an engaging gameplay experience.
The aesthetically pleasing design of Blueland’s products not only beautifies the cleaning process but also aligns with a minimalist lifestyle. After organizing and cleaning your space, maintaining a minimalist mindset can be extended to fun, simple gaming at playfreesolitaire.net where you can unwind with a classic game of solitaire.
Wow, this is such a creative idea! The before and after photos are amazing—what a transformation! I would love to try this out on my fridge too. Thanks for the step-by-step tips!
Wordle Unlimited allows players to track their performance just like the original game, offering statistics such as win percentages, streaks, and average guesses.
I love the transformation you achieved with the contact paper! It’s amazing how a simple change can freshen up the look of an old fridge. The before and after photos really highlight the difference. Great job and thanks for inspiring us to get creative with our kitchen appliances!
Hi
Get free, expert-written content designed to keep your readers engaged—no AI involved!
Choose the topic, and we’ll craft a high-quality, SEO-optimized article for you.
Want some topic ideas? It’s all free!
Let me know.
Wow, what a transformation! I love how the contact paper completely revitalized your fridge. The before and after photos are so inspiring, I might just give this a try in my kitchen! Great tips too, thanks for sharing!
Hello,
We specialize in supplying genuine True OEM refrigeration parts to keep your equipment running at peak performance. If you need reliable, high-quality parts for your True refrigeration units, visit us at ProRefrigerationParts.com.
Let us know how we can help!
Best,
Mike
Pro Refrigeration Parts
Hey there, whimsysoul.com is yours…
Wow, what a transformation! The contact paper really brightens up the fridge. I never thought to DIY something like this – I’ll have to try it myself. Thanks for sharing the tips and photos!
Hey there,
Our CEO asked me to reach out to you.
We’re running a special campaign to help business owners like you save time and scale efficiently by offloading time-consuming tasks.
At Offshore Wolf, we make it ridiculously easy (and affordable) to delegate the tasks that slow you down so you can scale faster without burning out.
Here’s what we offer:
A full-time, highly skilled VA for just $199/week – Yup, not a typo!
We do all the heavy lifting – Recruiting, training, and managing your VA so you don’t have to.
Work in your time zone – Your VA will sync with your schedule seamlessly.
50+ happy clients – Including brands like 50Coach, DigitalChef, Printivity, and contractors for Sony, Barclays, and EasyJet.
Imagine how much time you’d get back if you could delegate those repetitive tasks and focus on scaling. Whether it’s admin, customer support, or marketing help, we’ve got the right VA for you.
Want to learn more? Just reply “YES”, and I’ll send over the details.
Looking forward to chatting!
Best,
Rubina
Offshore Wolf (Offshorewolf dot com)
Hey there, whimsysoul.com is yours…
Subject: Product Inquiry from Davita International Ltd.
Dear Sales Team,
Davita International Ltd., a distribution, manufacturing, and trading company based in Lagos, Nigeria, is expanding its product line and wishes to explore potential procurement opportunities with your company.
We would appreciate you providing us with a catalog or product list outlining your current offerings. Detailed information including specifications, pricing, and any applicable bulk order discounts would be particularly helpful.
Davita International Ltd. purchases upfront via bank wire transfer and does not require credit terms.
Please do not hesitate to contact us if you require any further information.
Thank you for your time and consideration.
Sincerely,
Hi,
I’m ready to pay for the right opportunity to be featured on your website. Let me know your pricing and conditions.
All the best,
Daniela
Wow, this transformation is amazing! I never would have thought to use contact paper on a fridge. The before and after photos really show how much of a difference it makes. I can’t wait to try this out in my own kitchen! Thanks for the inspiration!
I went down a rabbit hole on your site (it’s good stuff) and noticed some of your backlinks might not be pulling their weight.
Want me to take a look? I’m offering a free backlink audit to spot weak spots and see how you stack up against your competitors.
What’s included:
-Quick audit to find underperforming links
-Competitor link gap breakdown
-EEAT review to see how Google-friendly your site looks
Totally free. If you find it valuable, all I’d ask for is a kind word. If you’re up for it, just hit reply with a “yes” and I’ll kick things off.
Cheers,
Jabez Reuben
Founder
Linkvalidator.io | The Blueprints
This message and any attachments are solely for the intended recipient and may contain confidential or privileged information. If you are not the intended recipient, any disclosure, copying, use, or distribution of the information included in this message and any attachments is prohibited. If you have received this communication in error, please notify us by reply e-mail and immediately and permanently delete this message and any attachments. Please reconsider not printing out this email because we want to preserve nature. Copyright © The Blueprints Agency Limited. All rights reserved.
Dear Whimsysoul,
We are pleased to invite your esteemed company to participate in the British Petroleum (BP) Vendor/Contractor Partnership Registration for the 2025/2026 term. This opportunity is open to companies globally, and we are excited about the potential collaborations ahead.
To proceed, kindly express your interest by requesting our Vendor Questionnaire and Expression of Interest (EOI) documents. Your prompt response would be greatly appreciated, as it will help expedite the vendor and contractor selection process.
We look forward to potentially partnering with you and exploring ways to drive mutual growth and success.
James Wilson
Procurement Officer
British Petroleum (BP)
Hi,
My name is Qasim, and I am a full stack web developer and designer from Pakistan. I previously worked for a digital marketing agency in Singapore, but I have recently been retrenched.
If you are looking to revamp your current site whimsysoul.com or design a new website, I would be happy to offer my services. You can propose a price, and I will do my best to meet your expectations.
Please let me know if you would like to see examples of my past work.
Thank you,
Qasim
Wow, this transformation is amazing! I never thought to use contact paper on a fridge, but the before and after photos are so inspiring. I love the design you chose—it really brightens up the kitchen! Can’t wait to try this out myself. Thanks for sharing!
So I was poking around your site (creeping a bit, not gonna lie) and it looks like your backlinks might be phoning it in.
I’m running a little side mission—offering free backlink audits to cool folks doing cool things. Here’s what I’ll send your way:
-A backlink audit: Find the freeloaders
-Competitor gap analysis: See who’s out-linking you
-EEAT checkup: Give Google all the right signals
No pitch. No weird upsells. If you get value from it, maybe throw me a testimonial.
If you’re curious, reply with a quick “Sure, why not” and I’ll get it started.
Cheers,
Jabez Reuben
Founder
Linkvalidator.io | The Blueprints
This message and any attachments are solely for the intended recipient and may contain confidential or privileged information. If you are not the intended recipient, any disclosure, copying, use, or distribution of the information included in this message and any attachments is prohibited. If you have received this communication in error, please notify us by reply e-mail and immediately and permanently delete this message and any attachments. Please reconsider not printing out this email because we want to preserve nature. Copyright © The Blueprints Agency Limited. All rights reserved.
I went down a rabbit hole on your site (it’s good stuff) and noticed some of your backlinks might not be pulling their weight.
Want me to take a look? I’m offering a free backlink audit to spot weak spots and see how you stack up against your competitors.
What’s included:
1. Quick audit to find underperforming links
2. Competitor link gap breakdown
3. EEAT review to see how Google-friendly your site looks
Totally free. If you find it valuable, all I’d ask for is a kind word.
If you’re up for it, just hit reply with a “yes” and I’ll kick things off.
Cheers,
Jabez Reuben
Founder
Linkvalidator.io | The Blueprints
This message and any attachments are solely for the intended recipient and may contain confidential or privileged information. If you are not the intended recipient, any disclosure, copying, use, or distribution of the information included in this message and any attachments is prohibited. If you have received this communication in error, please notify us by reply e-mail and immediately and permanently delete this message and any attachments. Please reconsider not printing out this email because we want to preserve nature. Copyright © The Blueprints Agency Limited. All rights reserved.
Hi,
My name is Qasim, and I am a full stack web developer and designer. I previously worked for a digital marketing agency in Singapore, but I have recently been retrenched.
If you are looking to revamp your current site whimsysoul.com or design a new website, I would be happy to offer my services. You can propose a price, and I will do my best to meet your expectations.
Please let me know if you would like to see examples of my past work.
Thank you,
Qasim
Hello
Would you like to enhance your online presence and accelerate your business growth?
Our premium traffic service offers a strategic solution to increase visibility and maximize your profits.
Don’t miss this opportunity to take your business to the next level.
Are you interested?
Best regards,
Omer Sheppard
Australia, QLD, Langshaw, 4570, 23 Reynolds Road
To stop any further communication through your website form, Please reply with subject: Unsubscribe !whimsysoul.com
Dear Whimsysoul,
I hope this message finds you well. I am reaching out to inquire about your company’s current capacity availability, as we have an upcoming project slated to commence in the second half of the year. We would appreciate it if you could provide a quotation for your services to help us proceed with planning.
Looking forward to your feedback.
Best regards,
George Silver
Purchasing Manager
Nexans
Do you need help with graphic design – brochures, banners, flyers, advertisements, social media posts, logos etc?
We charge a low fixed monthly fee. Let me know if you’re interested and would like to see our portfolio.
Wow, what a transformation! I never thought contact paper could make such a difference. Your step-by-step guide is super helpful, and the before-and-after photos really showcase the impact. I can’t wait to try this on my own fridge! Thanks for the inspiration!
What a fantastic transformation! I love how the contact paper completely revitalized your fridge! The before and after photos really show the difference. I’m inspired to give my fridge a makeover too! Thanks for sharing your process!
Hello
I wanted to offer my help in improving your site’s online visibility.
If you feel there are areas of your site that could benefit from optimization.
I provide tailored SEO services designed to drive more traffic and enhance performance.
Would you be interested in an SEO audit or any other improvements for your site?
Let me know if you’d like to chat more!
Thanks,
Rosa Clutterbuck
Great Britain, NA, Northend, Ba1 9nw, 17 Hart Road
To stop any further communication through your website form, Please reply with subject: Unsubscribe !whimsysoul.com
Dear Whimsysoul,
I hope this message finds you well. I am reaching out to inquire about your company’s current capacity availability, as we have an upcoming project slated to commence in the second half of the year. We would appreciate it if you could provide a quotation for your services to help us proceed with planning.
Looking forward to your feedback.
Best regards,
Matt Papenfus
Managing Director
Turnerconstuction.com
Hi,
Get free, expert-written content designed to keep your readers engaged—no AI involved!
Choose the topic, and we’ll craft a high-quality, SEO-optimized article for you.
Want some topic ideas? It’s all free!
Let me know.
Best,
Sophia
Howdy from DreamProxies.com
Exciting news: quality, fast and trusted private proxies now even better price: 50% SALE – For All Private Proxies!
View proxy offers and sales – DREAMPROXIES.COM
Key features and advantages that come with each proxies plan on DreamProxies.com:
Fully anonymous – Fully private and anonymous top quality proxy servers
Ultimate quality – Highest superior quality and reliability with every proxy plan
Ultra-fast speed – Up to 1,000 mb/s per proxy – fastest speed servers
Unlimited Usage – Unlimited bandwidth and complete freedom using proxies
Strong Servers – Fully-powered stable USA datacenter proxy servers
Low-cost options – Among the cheapest proxy services you can find on the market
Bonus discounts – Special coupons and offers for proxies on website
50% DISCOUNT for all proxy packages – on DreamProxies.com
Hello team,
Our goal is to keep your audience engaged with your website, so let us help you do that.
My writers and I are creating articles on a range of relevant topics and we can adjust them to best fit your content needs.
We don’t charge for this service, and we don’t use artificial intelligence.
Would you be open to discussing a few ideas?
Thanks a lot,
Sophia
Hi there, its good post on the topic of media print, we all be
familiar with media is a fantastic source of facts.
DearWhimsysoul,
I hope this message finds you well. I have a compelling business proposal that offers significant benefits for both parties, creating a win-win opportunity for collaboration.
I’d love to share more details and explore how we can work together to achieve mutual success. Please feel free to reach out at your earliest convenience.
Looking forward to your response.
Best regards,
Steven Pember