I’ve been living in the same (rent-controlled!) studio apartment in San Francisco for over 5 years. I love our apartment – it has tons of character and great natural light. What I hated about it? The kitchen!!
I had pretty much given up trying to make this room fun, but then quarantine hit so I used that time to tackle our small kitchen. And, our rental kitchen makeover turned out BEAUTIFUL! In this post I’ll be sharing all the before and after photos along with linking out to all the decor and supplies I used plus sharing tips to help you redecorate your rental kitchen!
My $530 Rental Kitchen Makeover (BEFORE & AFTER photos!)
>> Got a question about my kitchen makeover that you need answered quickly? DM me on Instagram @thewhimsysoul and I’ll be happy to help!
I’ve really given up on making my apartment kitchen a “dream” kitchen. I was in the mindset that due to the limitations of renting, there’s very little I could do to this room to make it personalized and I’d have to wait until we own a house to go ham on a better kitchen.
WRONG! You don’t have to own a home to make your rental kitchen your favorite room in the apartment!
My big quarantine project was redecorating our kitchen and I LOVE how it turned out. This process took a long time but was easy. And the best part? Super affordable, coming in just over $500 for a truly impressive apartment kitchen makeover.
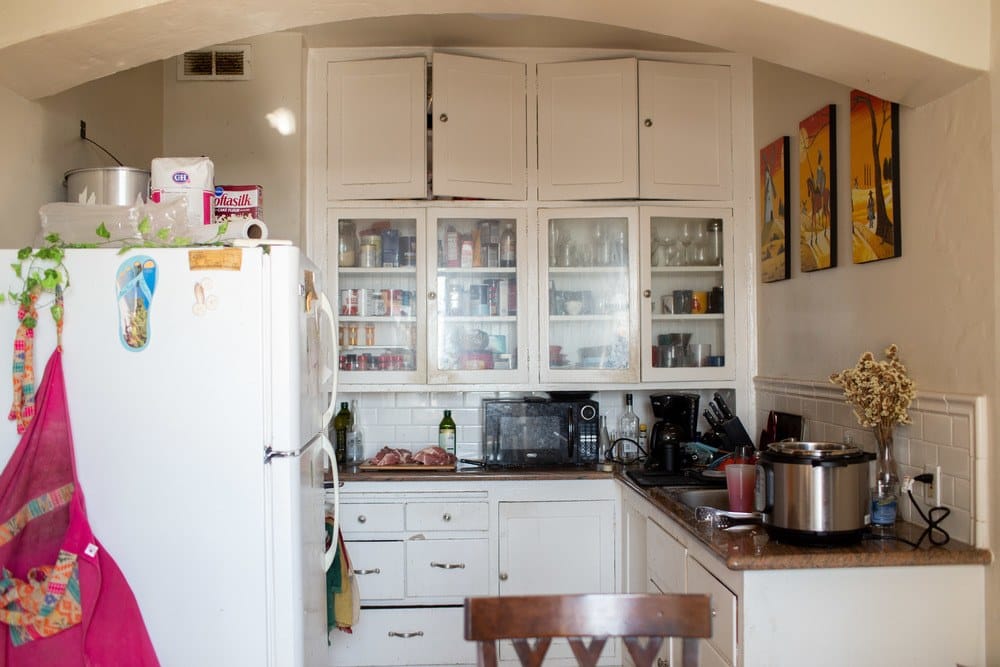
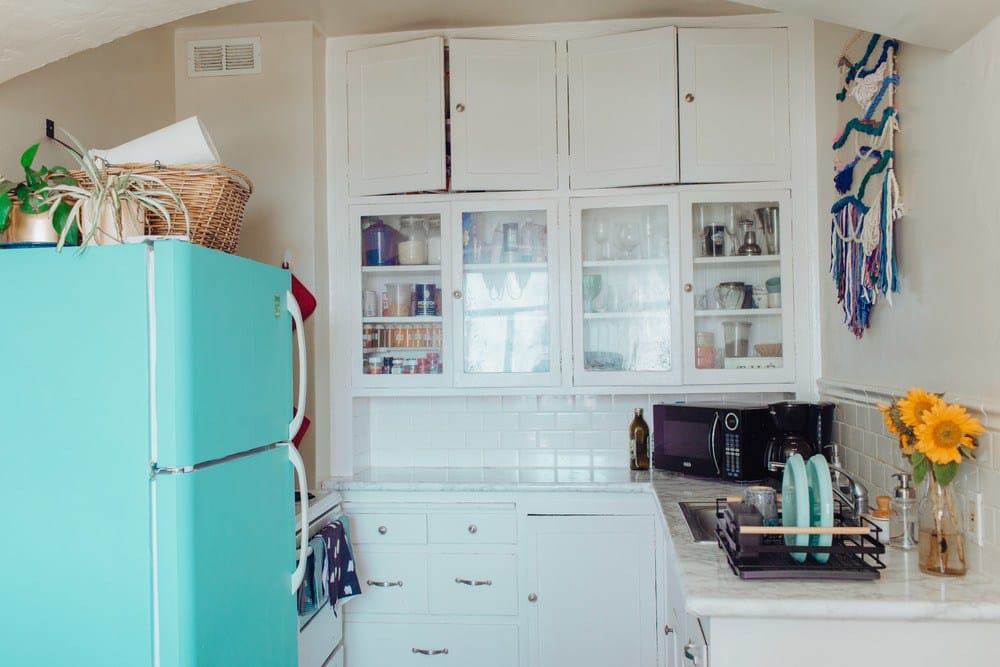
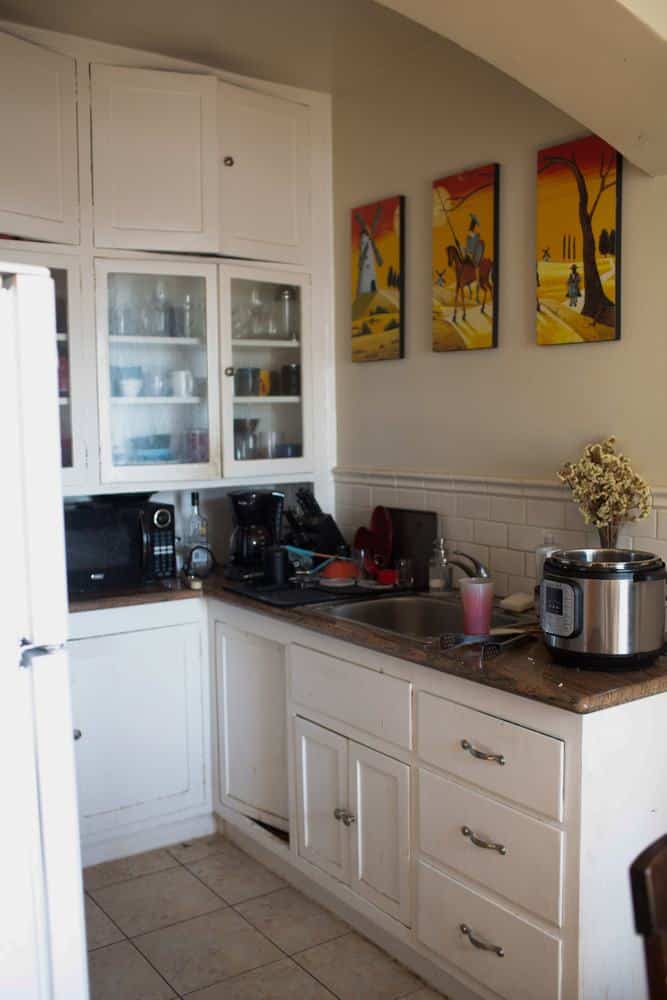
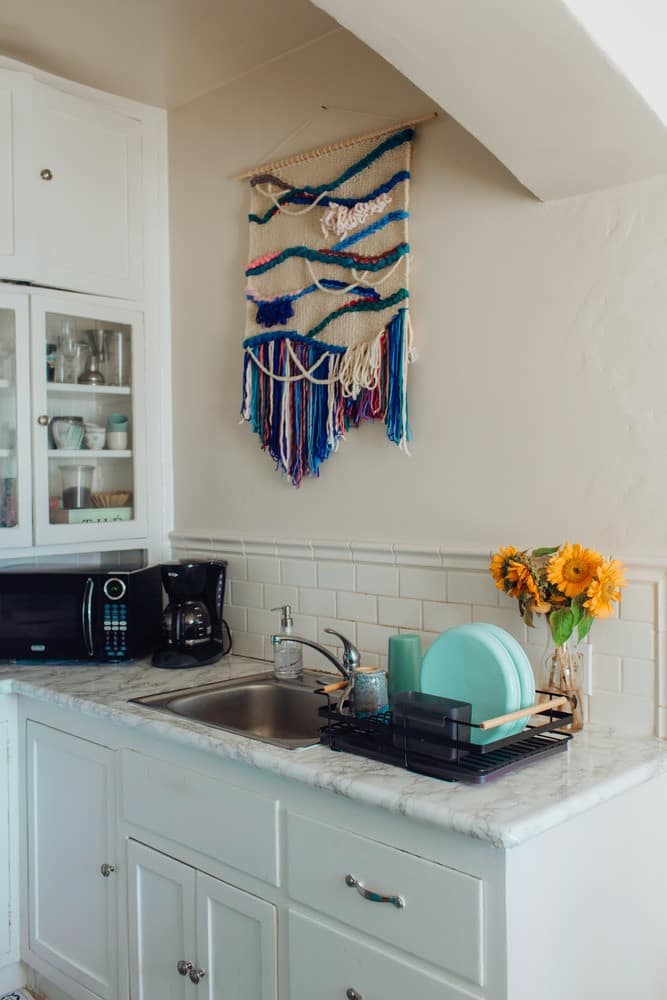
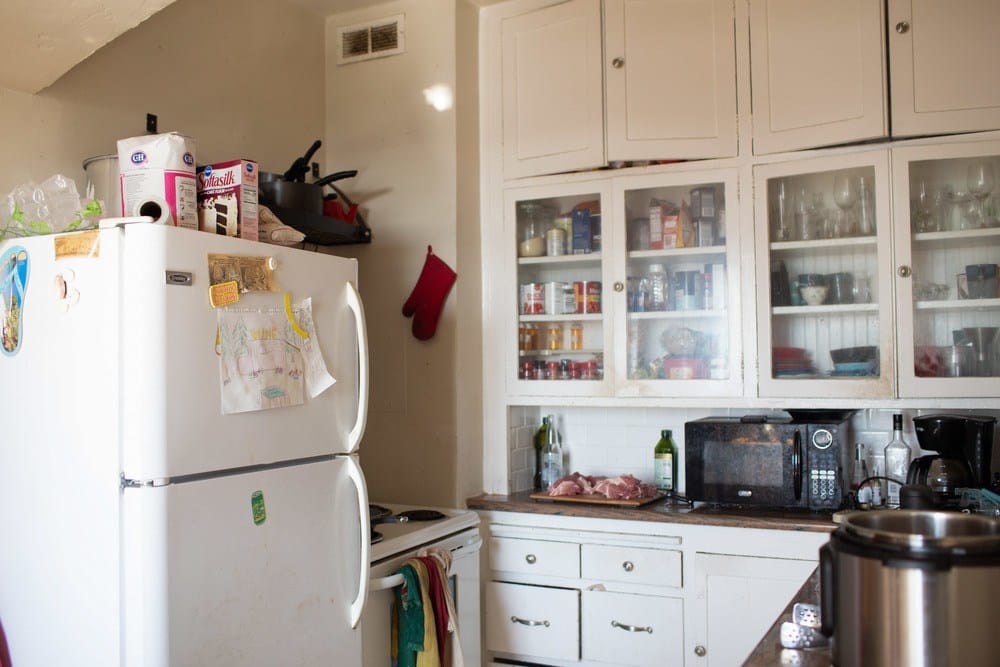
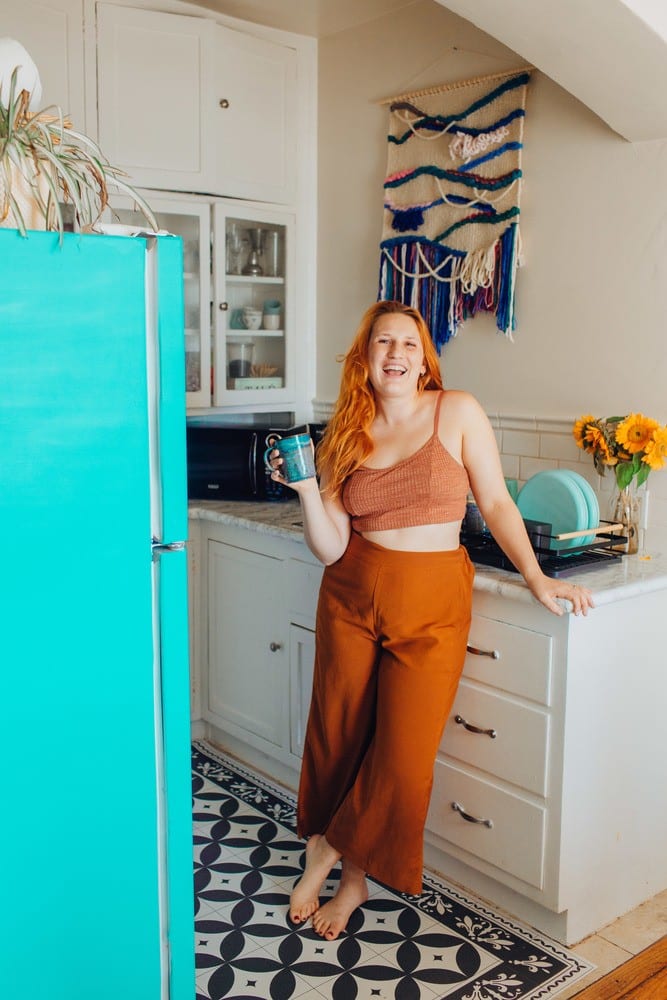
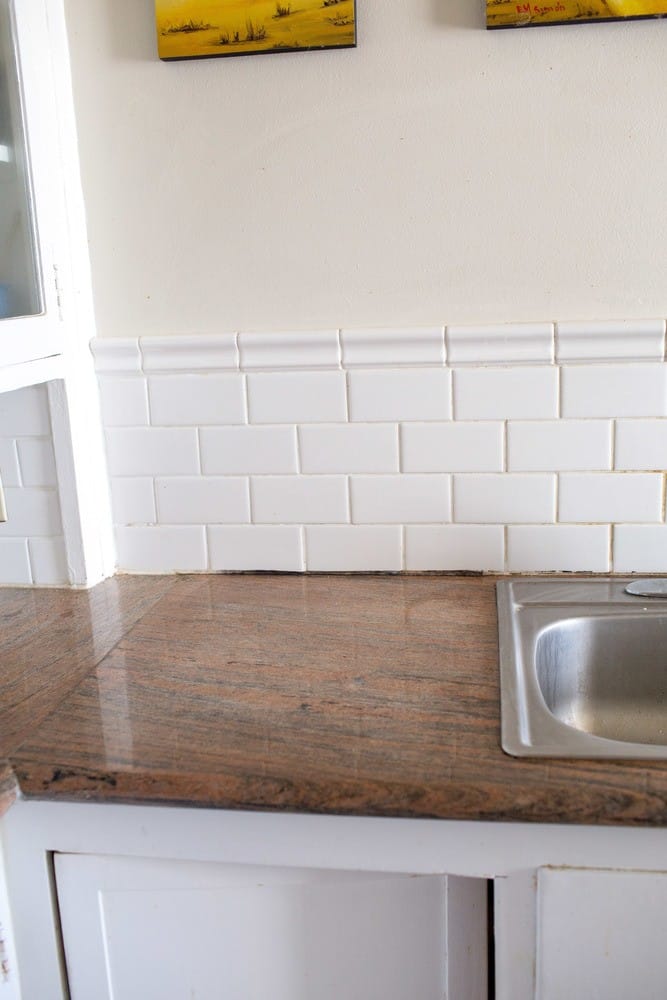
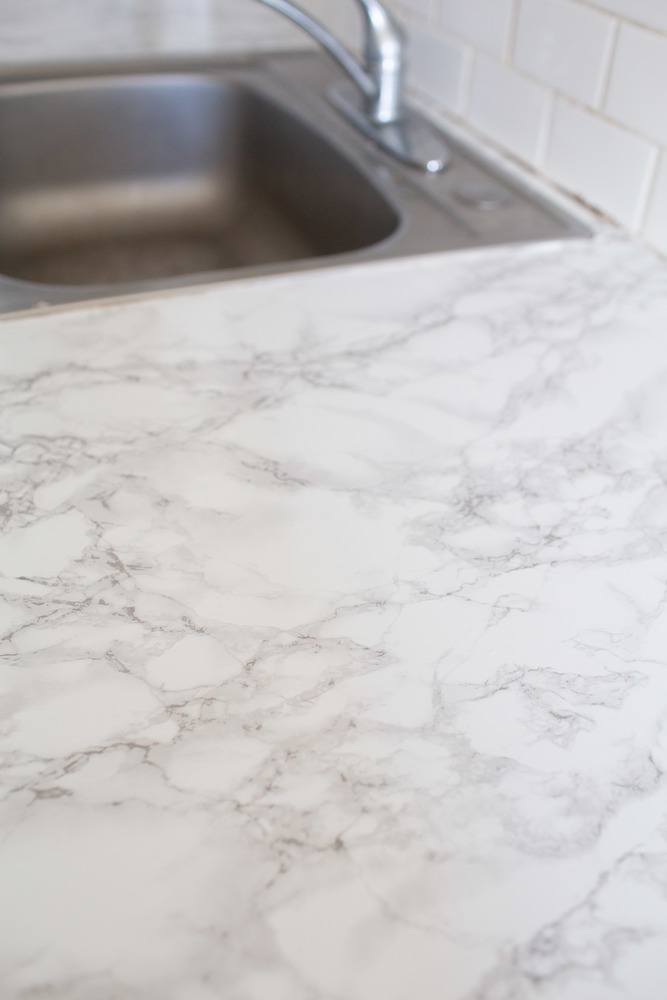
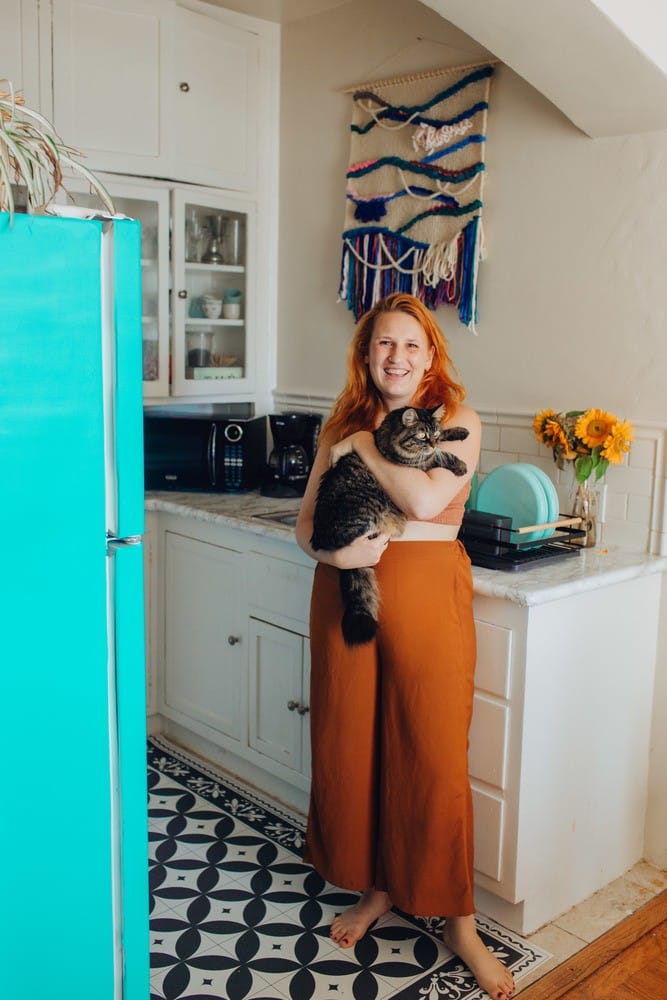
Here’s some before and after photos for you to see!
Rental Kitchen Before And After Photos
Decor Tip: Question Everything
Since we’ve been living in our apartment for so long, we got really comfortable with living with “the ways things are” What do I mean by that? Well, for example when we moved in, we stuck the microwave in this one spot and… never moved it. In my mind, that’s where the microwave belonged, that it couldn’t fit anywhere else because that’s the place it’s always been.
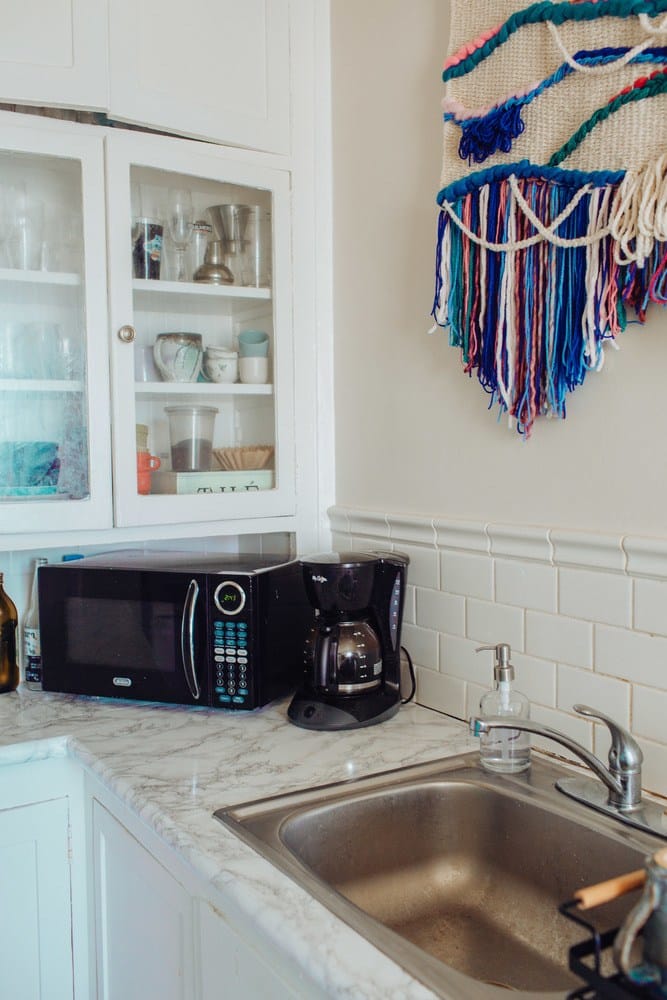
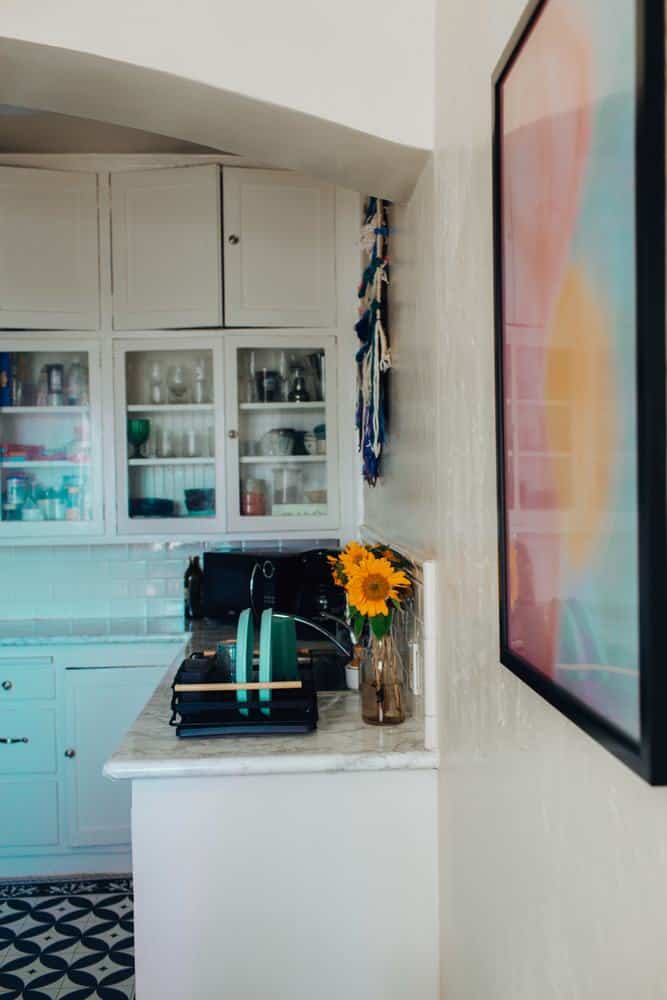
But then my husband suggested we move it to the corner and holy cow, this unlocked ALL the ideas! Suddenly we had more counter space, the kitchen felt bigger and everything sort of fell into place after that.
So, that’s my big decor tip as you start redecorating your kitchen (or other rooms in your apartment!) Challenge yourself to question everything, question why things are where they are and if there’s a more functional way to live. Because I bet there is.
Decor Tip: Make A Mood Board or Mock-Up Design
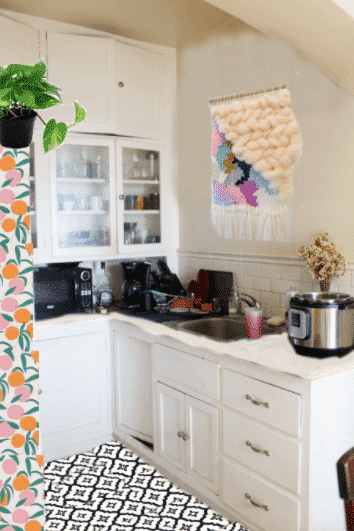
The first thing I did when I started our rental kitchen makeover was to take photos of our kitchen and then make a mock-up design of what I wanted the space to look like. I used photoshop to put this together, but you don’t have to get all fancy. A Pinterest board will suffice!
I loved this because it helped me take a moment to sit back and really process what I wanted the space to look like, versus charging ahead blindly. It also paved the way for a clear, realistic budget for the makeover because I had a better idea of the “big purchases” ahead.
Here’s that mockup photo! As you can see, we went a different direction with the fridge, but pretty much nailed the floor.
Kitchen Budget Makeover Breakdown
Alright, here’s the breakdown of cost and links to my new decor.
- Countertop marble contact paper: $40
- Blue fridge contact paper: $20
- Vinyl Floor Rug: $130
- Wall Hanging: $190 (commissioned by a local artist)
- Thrifted glassware + jars: $20
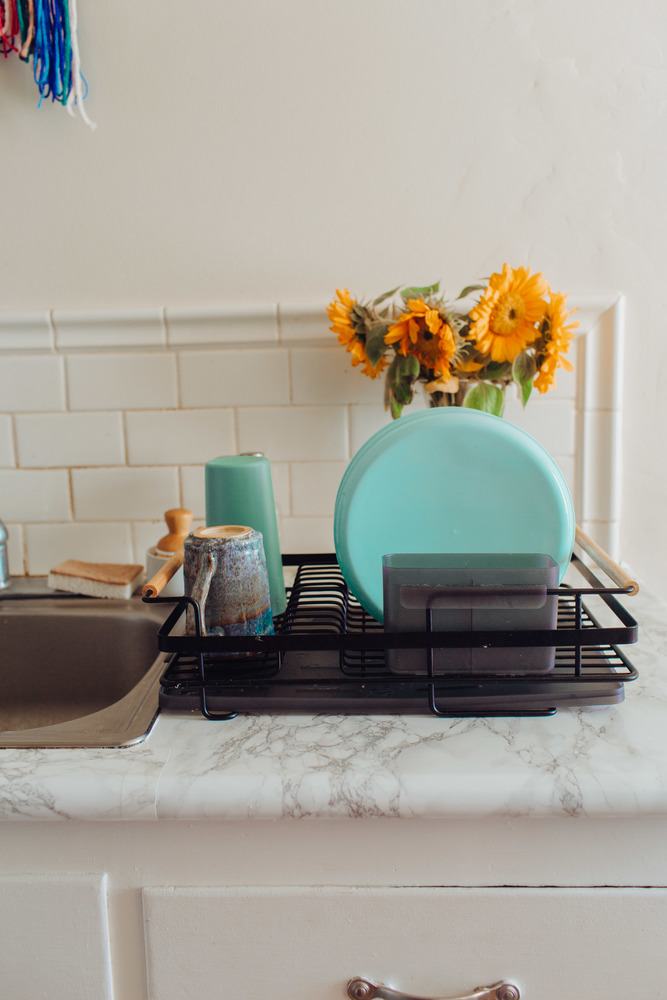
- Dish Rack: $35
- Wall Art: $60 (we painted these, I just spent $ on frames and prints!)
- Tea Towels: $30
- New Plant from Trader Joes: $7
- Paint: free from the property manager
- New plates + cups: $7
In total, that’s about $530 for a totally different kitchen that’s 100% renter-friendly! I know that we’ll be taking everything but the contact paper on the fridge and counters with us whenever we move in the future, so I felt really good about investing in some pieces (like a more expensive wall hanging!)
All The Changes I Made In My Rental Kitchen Makeover
Let’s chat through the design process of all the changes! I have stories and tips for some of the updates I made that I want to share as you gather apartment kitchen ideas!
Vinyl Floor Rug Saga
For a small kitchen makeover, the floors are a HUGE deal. We hate the floor tiles in our kitchen. Something about the design makes them always look dirty. I went through so many options for transforming these floors and it was the hardest part of this whole makeover.
I thought about Ruggable (washable cloth rugs) but we have to pay for the laundry in our building and I didn’t want to commit to spending an extra $20 a month for keeping a kitchen rug clean (we’re messy cookers!) I bought some peel and stick floor tiles from Amazon that were super affordable but didn’t’ realize until they arrived that they are actually pretty permanent and could destroy the floors when we removed it upon move out.
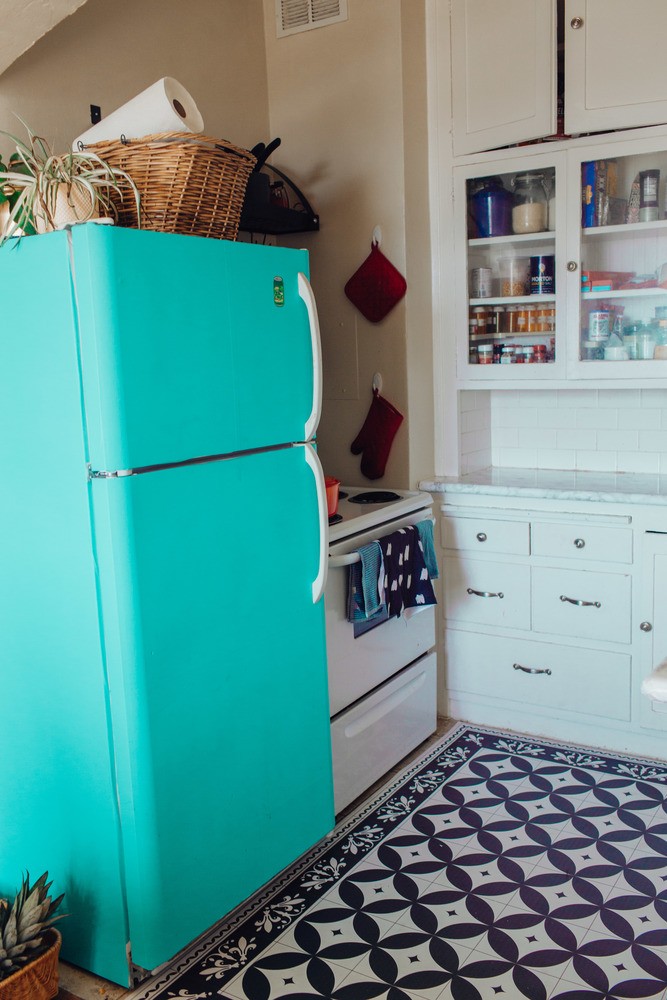
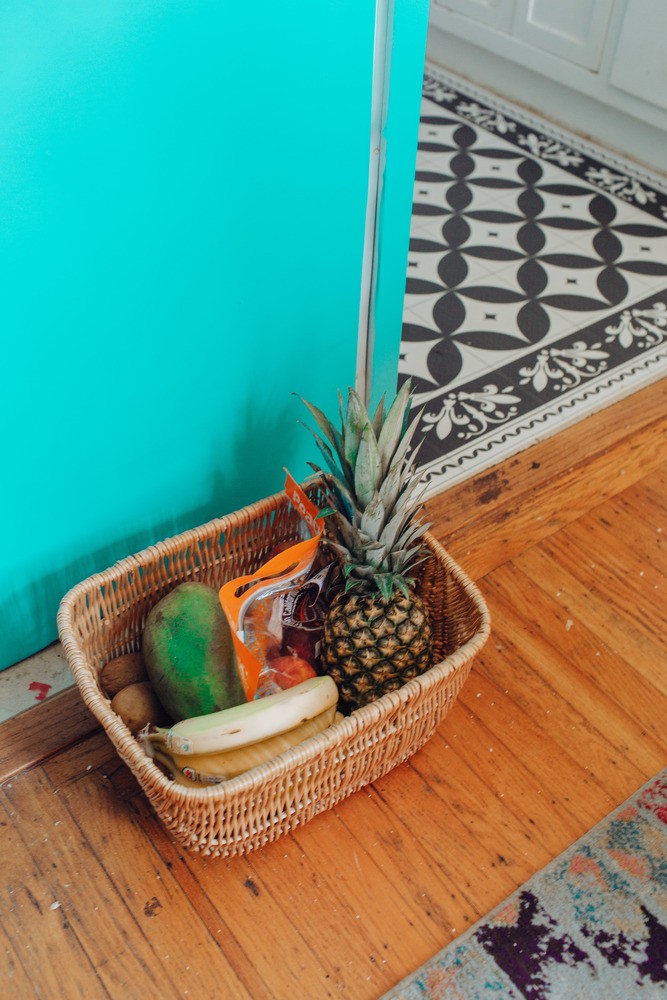
Finally, I discovered vinyl floor rugs that are basically a combo of floor tiles and a cloth rug. I found a store on Etsy that sells tons of designs in all different sizes and fell in love with this rug. It adds the perfect “vintage” touch to our kitchen and ties the whole room together. This rug stays in place well and can be removed just like a regular rug fo cleaning. BUT, it’s plastic so it can get wet and dirty. It’s amazing!
Contact Paper Magic (Fridge And Kitchen Counters!)
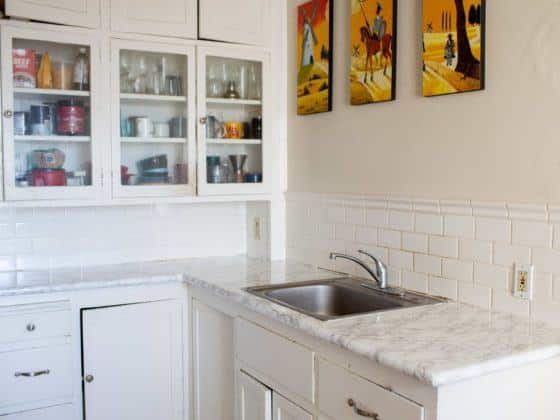
Rental kitchen countertops are always gross. I think it’s the rule. As you can see from the photos below, our counters are this gross brown granite and it just visually cuts the room too much. Enter: contact paper!
I know it’s a bit basic, but hot damn marble counters just look so nice. Since our kitchen is white, it helps make everything uniform and instantly made the kitchen feel brighter and bigger. I bought contact paper off Amazon for $40 and it took just an hour or two to put it on. I have a whole post with tons of tips here you should read if you want to do a similar project!
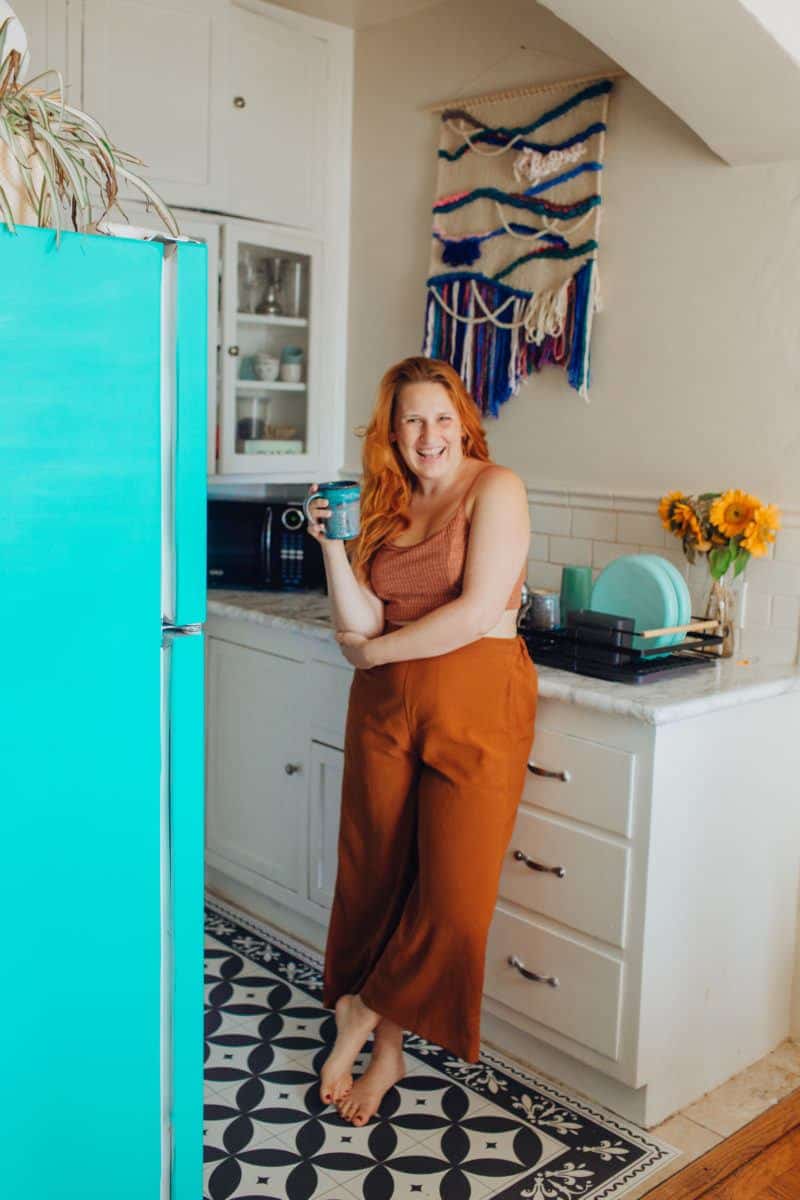
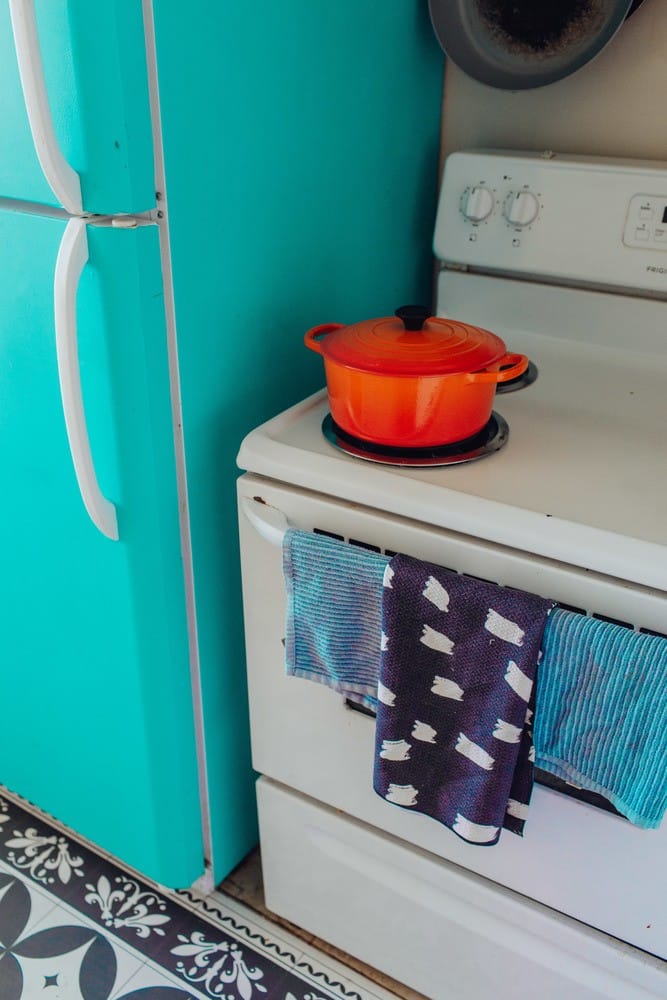
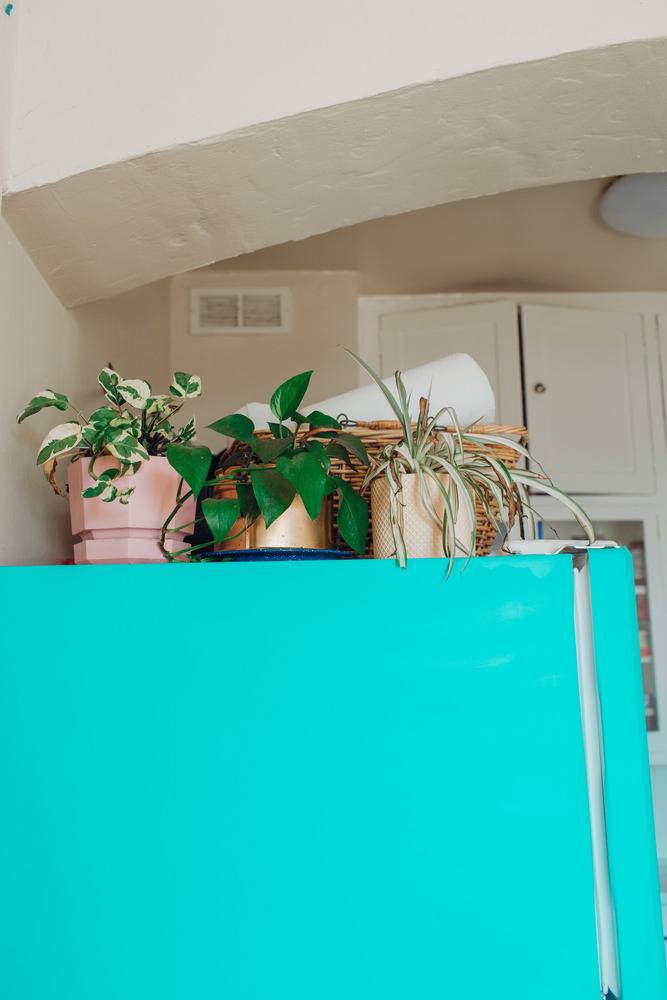
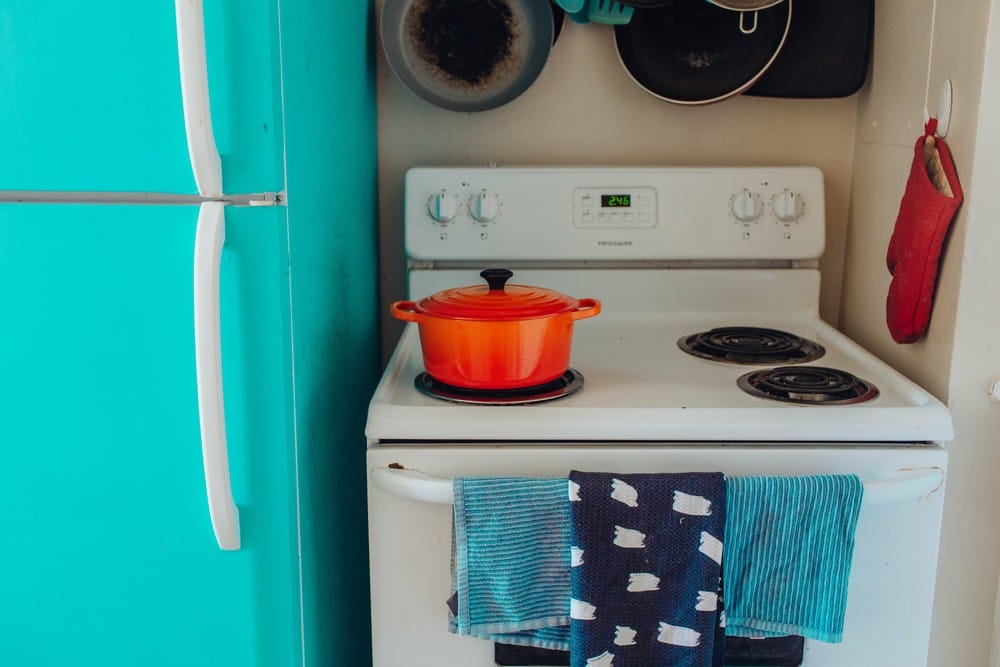
BUT, contact paper doesn’t have to be limited to your counters. It looks beautiful on your fridge, too! As I share in this tutorial post, it’s also easy to install a contact paper on fridges. It’s been on for a couple of months and looks brand new still. It’ll be easy to peel off whenever we move out and that blue pop of color is EVERYTHING. Seriously, I never thought I’d be able to have a fun retro feeling fridge in a rental.
Rental Cabinet Makeover (2 ways!)
The first thing I I did with this project was to repaint the cabinets. After 5+ years of cooking in our small space, no matter how much work we put into cleaning, I feel like our cabinets and kitchen walls were ALWAYS dirty. I’ve taken a magic eraser to those drawers too many times to count but it never made a difference!
A renter-friendly cabinet makeover with paint, HOW KARA HOW?? Isn’t painting against your lease? Yes and no. See, I didn’t paint a new color. I asked our property manager for some paint that matched what was already on our walls and cabinets. I know they keep some in the garage downstairs so it wasn’t a hassle for anyone. Plus, I was offering free labor to upkeep our unit, so our landlord didn’t mind!
I was given it for free and I already have paint brushes (art kid perks!) so I was able to repaint all the cabinets in a weekend. A fresh coat of paint literally made all the difference in making the cabinets feel new.
If you can’t paint, you can use temporary cabinet covers in the form of contact paper. This will be easier on cabinets that are solid, not with windows like the ones we have.
Little Decor Details
So, the rug, contact paper and new paint were the BIG important changes we did, but the smaller decor details are also vital when you’re doing a small space makeover. Think about your color scheme, the textures you’re bringing into the space and how those elements will support your overall design.
Since we went with a bright blue fridge, I chose to keep that blue and cool-toned theme throughout the kitchen. I found new plates and cups on clearance at Target that ALMOST match the fridge (it was fate!) I also bought new blue towels to match.
Then I found black and white geometric decorative tea towels for a pop of fun. I knew these would match the floor rug! I swapped out the artwork above the sink for a wall hanging to bring texture to the walls. Not everything should be “flat” when decorating. I had Sharon, the artist, work mostly with cool tones to fit the scheme.
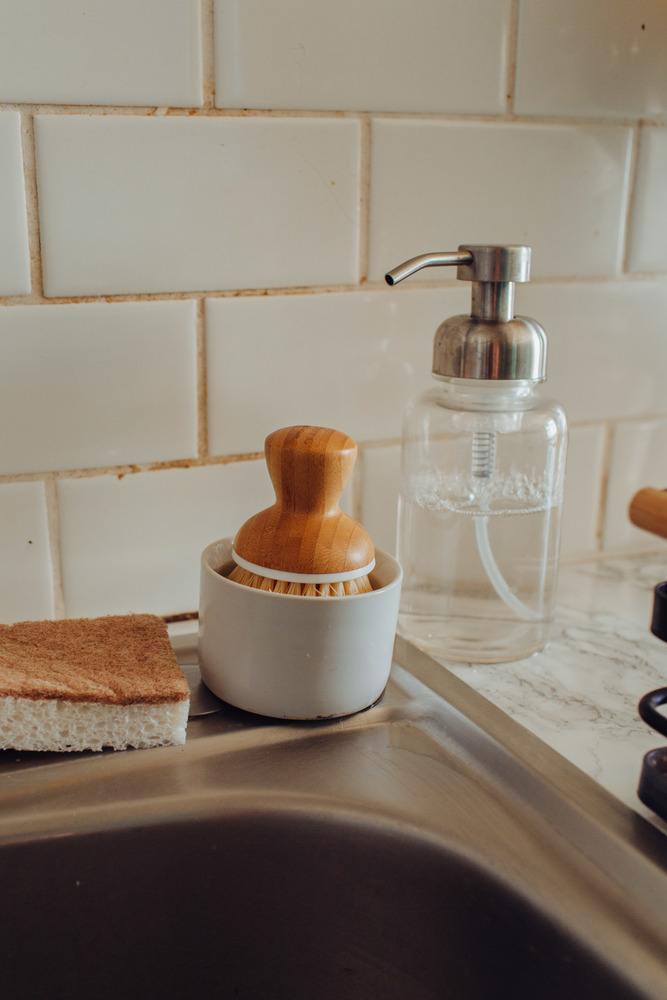
I’m a big believer in swapping out plastic and packaging whenever possible. So, for the kitchen sink area, we swapped out dish soap for a glass dish soap dispenser from Grove Collaborative (same on the other side with hand soap!) We now buy soaps in bulk and refill both dispensers when they are empty. It looks cleaner and more elevated, plus it’s better for the environment!
We reorganized our cupboards to find space for all the food we were keeping on top of our fridge. This made that area open for a wicker basket that is now home to paper towels (so cute!) and a few plants to add life to the room.
I had two plants and their pots already, along with spray paint on hand from previous DIY projects (like my pink locker in our living room.) I then bought a new plant from Trader Joes to fill the space!
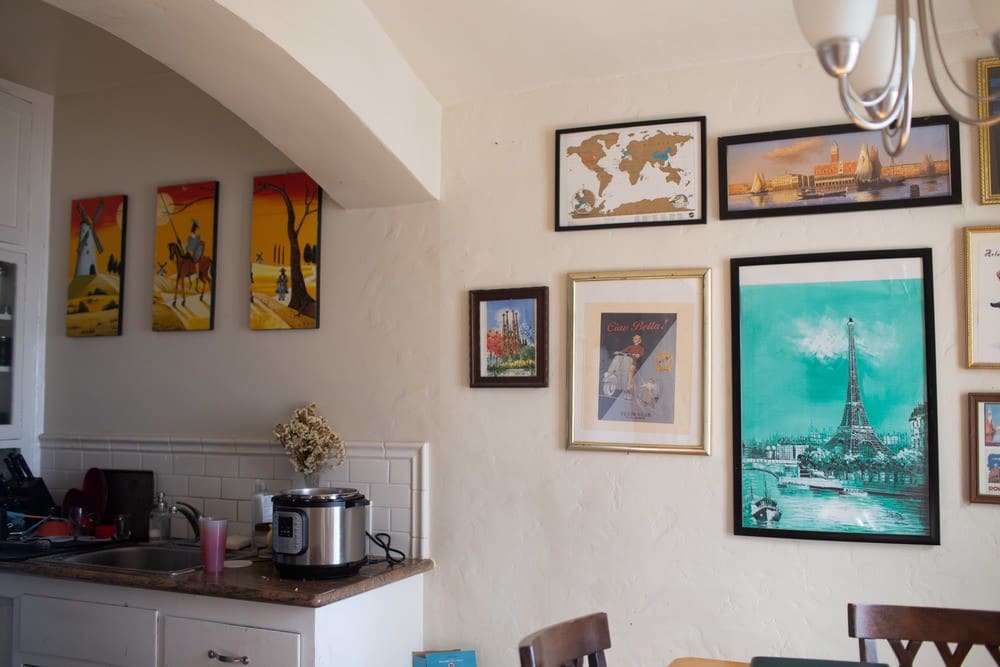
And lastly, we parted ways with our big statement wall of artwork. I collect art while traveling and have had this wall in some shape or form since college. But it was time for a change. So, I moved all the art to our hallway to make this Hogwarts-feeling hallway that towers over you as you pass through (it’s really cool!)
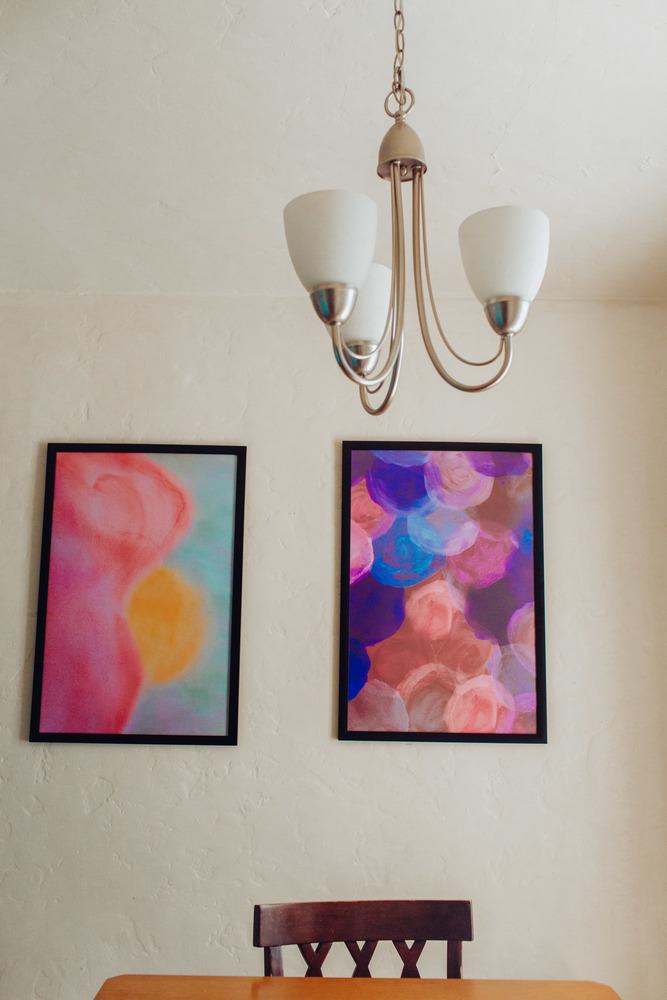
Robin and I have been really into watercolors and mindful art since Quarantine has started. It’s been such a great way to relax and unwind. And, we’ve been making some pretty cool pieces of art in my opinion. I loved two pieces so much I ordered large prints from Target Photo and framed them for our kitchen. I made the one on the left, Robin did the one on the right.
I LOVE walking in and seeing things that we made from our own hands and mind. It adds the perfect last touch of love to our kitchen.
Like this post? Check out my huge rental apartment makeover blog post here where I walk though our whole boho studio apartment. (Though, it’s older and doesn’t include the new kitchen decor!)
I hope this post helps you do an apartment kitchen makeover on a budget!! Everyone can make a rental space feel like their own, no matter your budget or lease restrictions. You may have to get a little creative but your dream kitchen is out there!
If you have any tips to add, leave a comment below so everyone can see. Got questions? Comment or DM me on Instagram @thewhimsysoul and I’ll try and help!


3 comments
It looks beautiful! Excellent job!
Thanks for showing. Your kitchen now looks really fantastic. I really like the current version. Thank you so much for letting me know what you bought and for how much. This really gives hope that for relatively little money the kitchen can look completely new and very cool.
I want you to know the utility this product brings